You keep saying you will start a blog this year, then you close the laptop and do nothing.
You tell yourself it is too late, too full of other blogs, or that no one will care what you write anyway.
I was in that same spot seven years ago, staring at a blank screen and overthinking every small decision. I’m glad I didn’t close the laptop that night.
Back then, I didn’t see the truth. Every month you wait is a month you lose. Lost readers. Lost practice. Lost income you could already be building.
So ask yourself, how long will you keep repeating that cycle?
You do not have to keep doing that.
In this step-by-step guide, I will show you how to start a blog using the same setup I use, the same one most serious bloggers use too, in a way that has no tech stress.

Sounds good? Let’s get started!
Disclosure: This post has affiliate links. I earn a commission if you buy, at no extra cost to you.
Step 1: find your blog topic (this one decision matters more than you think)
If you have a business, company, or organization, your blog topics should be about your product or service so you can promote it.
If you’re an individual, choose a topic you like to discuss, which is called the “Blog Niche.” The blog niche is the specific topic of your blog, like Food, Travel, Tech, or something you enjoy writing about.
Here are two questions you should ask yourself before deciding on a blog topic:
- How much are you passionate about the topic?
- How much are other people (your target audience) passionate about the topic?
So basically, if you really love doing something and you also have the skills and the real life experience to back that up, then you can totally go for it without overthinking.
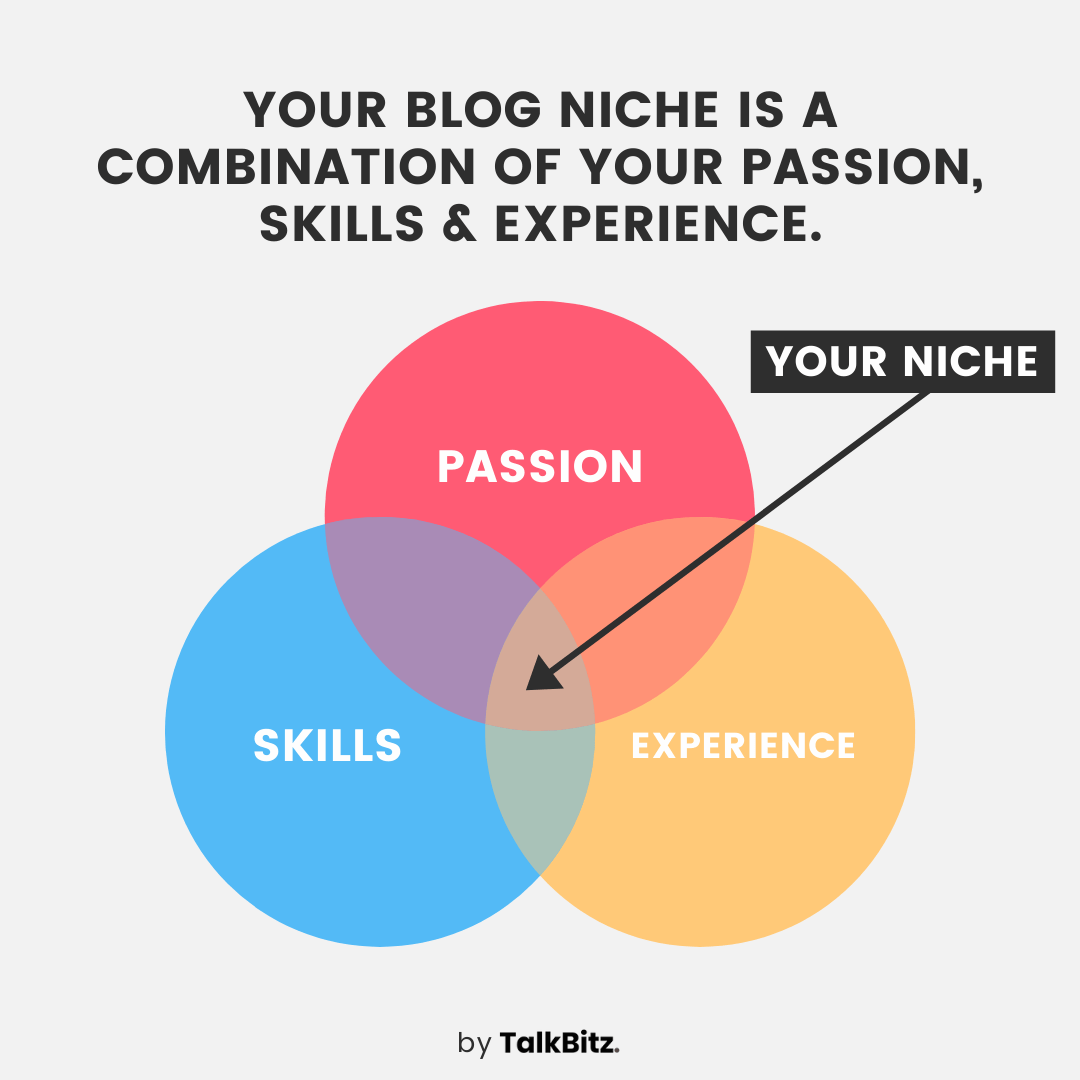
Also, if you know who your readers are and what they actually want, that will help make your blog more appealing to them.
For example, if you like cooking and have a lot of experience as a chef or someone who cooks a lot at home, you could start a food blog.
So this lets you put out your favourite recipes and also give out some helpful cooking tips you know.
Here are also some blog topics that are actually doing well right now, in case you need a starting point:
- Personal Finance and Side Hustles
- Health and Wellness
- Mental Health and Mindfulness
- AI Tools and Productivity
- Food and Recipes
- Sustainable Living
- Home Organization
- Parenting
- Remote Work and Freelancing
- Pet Care
And before you settle on one though, remember that whichever topic you pick, writing about just facts does not work anymore. AI is already pretty good at answering those.
Someone types “meal prep ideas” into ChatGPT and gets an answer right away.
But “I meal prepped for 30 days straight on a $200 grocery budget and here’s what actually worked” is something only a real person can write, and it’s the kind of thing even social media audiences like and also AI pulls from when it answers someone’s specific question.
Yes, what works better is writing from the inside.
Your actual experience with something, a real result you got, an opinion on something your audience genuinely has no idea about.
That’s what people still click for.
So don’t just pick something you find interesting to read about. Pick something you actually know from living it.
The moment you pick a topic, you’re already ahead of everyone still thinking about it.
Step 2: why almost every serious blogger ends up on WordPress
When starting a blog, you need a blogging platform, which is similar to a kitchen in a restaurant.
Just as you need to make your kitchen healthier and more reliable to attract more customers, you also need a good blogging platform to write your blog posts.
You have multiple choices for blogging platforms. Some are easy to use, while others have limited customization options and require a significant investment to upgrade.
In the blogging world, WordPress is the world’s most popular blogging platform, powering over 41% of all websites, and you do not need to know any coding to use it.
The best thing is that it’s free to use and you have complete control over your blog.
That is the way I built this blog.
But can WordPress do everything?
Not quite on its own. That’s what Step 3 is about.
Step 3: get web hosting without overpaying for it
Just imagine the restaurant once more. It has a kitchen, right?
And what about the dining area?
The restaurant requires a kitchen to prepare food and a dining area to serve it to customers.
Similarly, you need WordPress to handle your blog content and also a web hosting service to deliver it to your readers.
In other words,
The blogging platform (WordPress) will take care of all the content, blog posts, media, and everything on your blog. (like a restaurant’s kitchen.)
The Web host will make your blog live and accessible on the internet by providing a space for it. (like a restaurant’s dining area.)
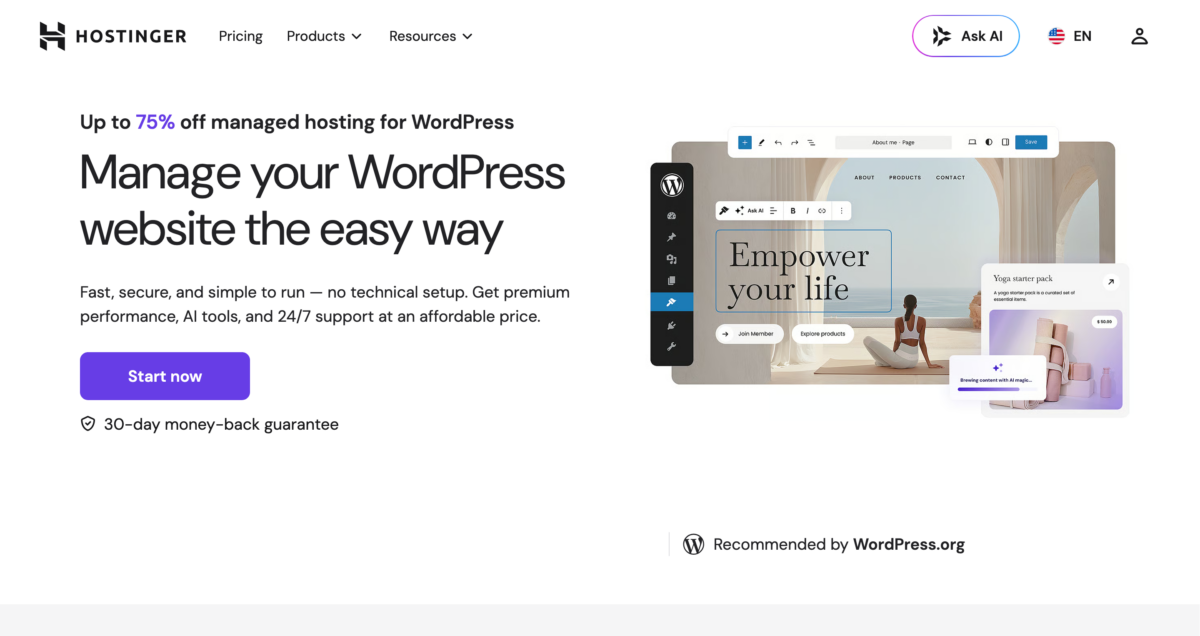
Now, you have to choose a beginner-friendly web hosting service provider to start building your blog using WordPress. I recommend Hostinger for this, and I’ll walk you through the exact setup in the next step.
Step 4: How to set up your blog on Hostinger (takes about 20 minutes)
I’ve set up a few blogs on different hosts over the years.
Hostinger is the one I keep recommending for beginners, mainly because hPanel, their dashboard, is one of the cleaner ones I’ve used.
And the whole setup, from buying the plan to having WordPress running, takes about 20 minutes.
So yes, if you’re just starting your very first blog and want to keep costs low while you figure out if blogging is actually for you, this is the right starting point.
And if it doesn’t work out, there’s a 30-day money-back guarantee, so you’re not locked in.
→ Start your blog on Hostinger, my top pick for anyone starting their first blog
Let’s start setting it up by choosing your hosting plan.
For most beginners, the Premium plan is the right starting point. It covers 3 websites, comes with a free domain for the first year, free SSL, free business email, and everything you need to get started.
There is no need to pay more than you need when you are just getting started.
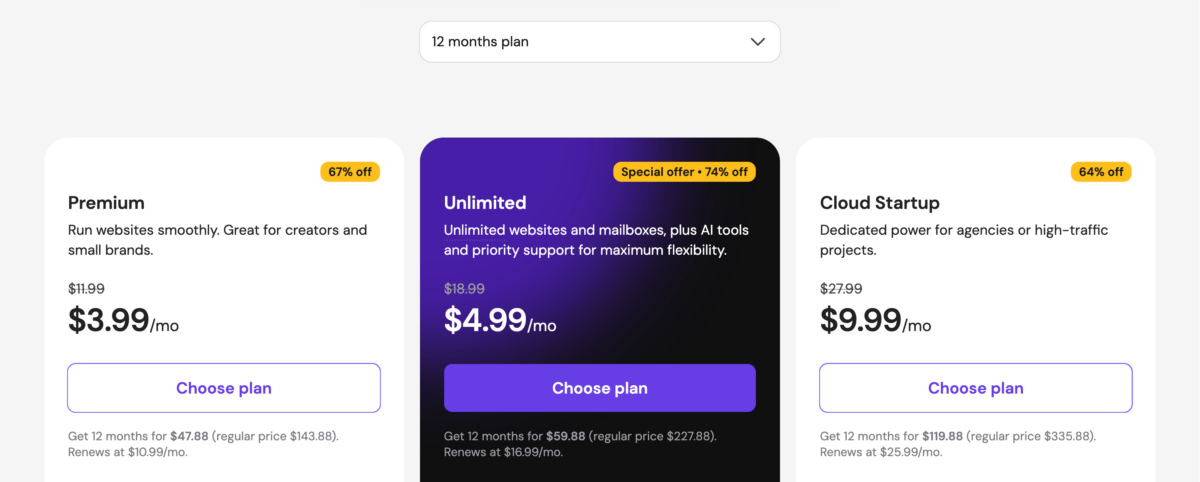
The best value option is the 12-month plan, which comes to $45.49 total for your entire first year when you use the coupon code TALKBITZ at checkout.
That’s an extra 5% off on top of the already discounted price. Your hosting, free domain, free domain privacy protection, and SSL, all in one clean total with no surprise charges.
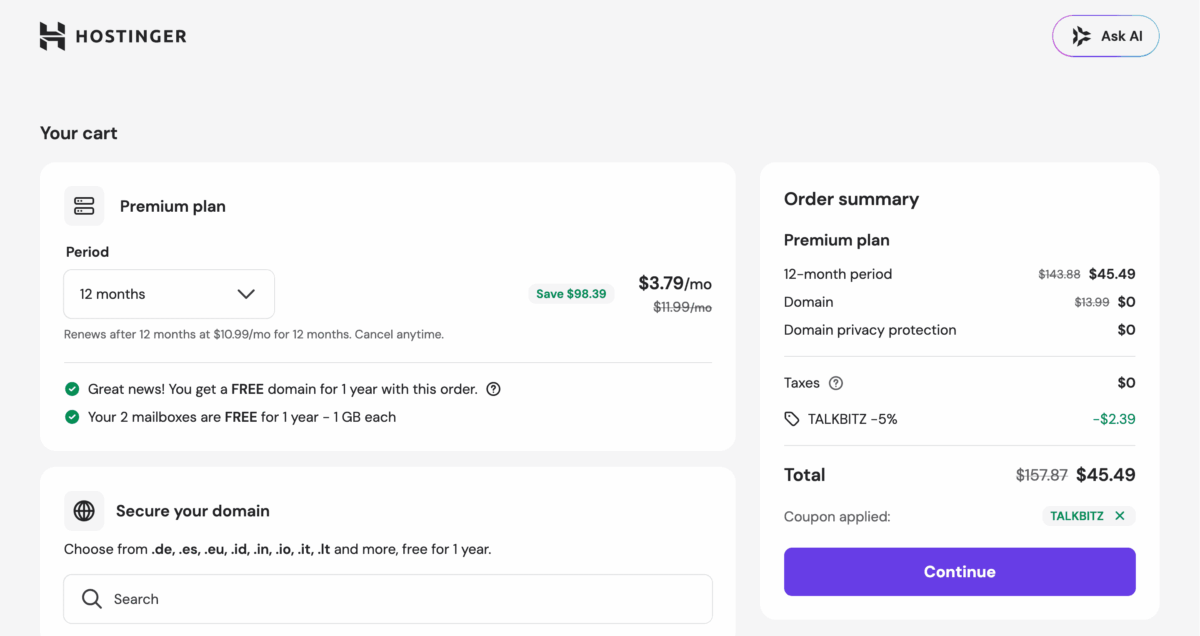
And if you already know blogging is something you want to keep doing for the long term, the 24-month plan brings it down to $3.49/month ($83.76 total before coupon) and the 48-month plan goes as low as $2.99/month ($143.52 total before coupon).
Either way, you will pay $10.99/month after the term ends, and everything is clear from the start, with no unexpected charges.
If you’re not ready to commit yet, you can also go monthly at $11.99/month. But you lose the free domain offer, and the per-month cost is also a bit higher.
My best recommendation is to start with the 12-month plan.
Paying $45.49 for your first full year is genuinely hard to argue with, and it gives you enough time to find out if blogging is something you actually want to continue with before committing more.
Then, enter the domain (your blog address) you want to use.
It can be your name, company, organization name, or any name you want for your blog domain.
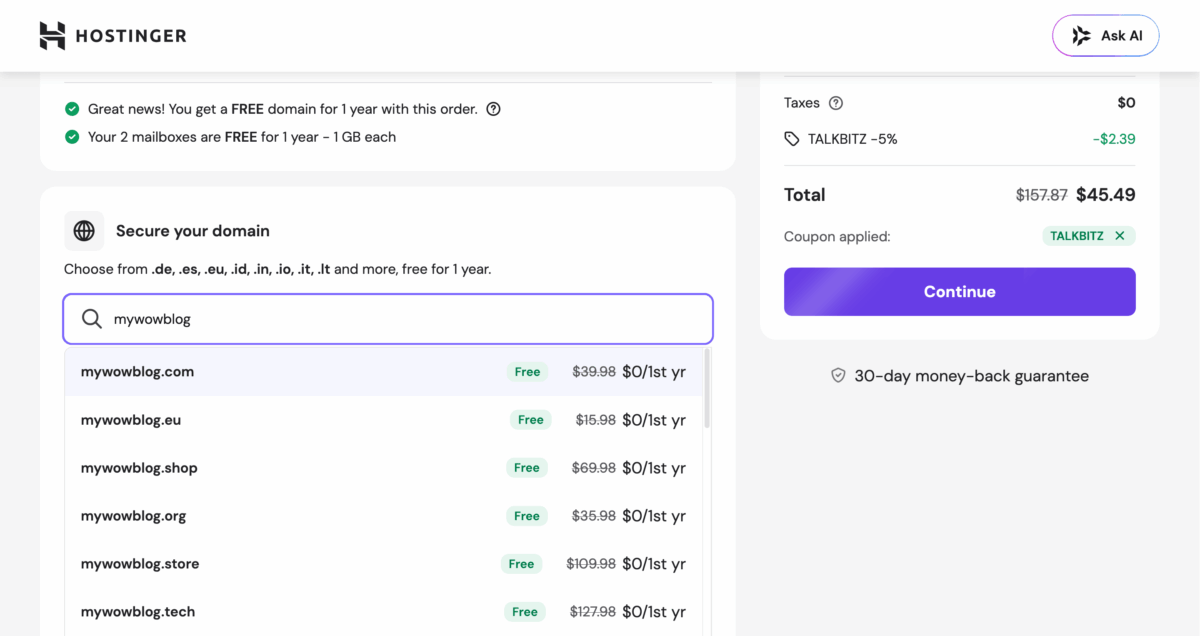
Hostinger gives you a free domain name for the first year and includes a free SSL certificate too.
Unlike some other hosts, they also give you free WHOIS privacy protection, which keeps your personal details like your name, address, and email hidden from the public domain database.
You don’t have to pay extra for it.
This means you can start your blog without spending any extra money on those things.
- What is an SSL certificate?
- It encrypts data between a website and a visitor’s web browser. Think of it like sending a letter. Without SSL, it’s like sending it in a plain envelope that anyone can open. With SSL, it’s like sending the letter in a locked envelope that only the recipient can open.
But choose your domain name carefully. Keep it short and easy to remember because you can’t change it once you pick it.
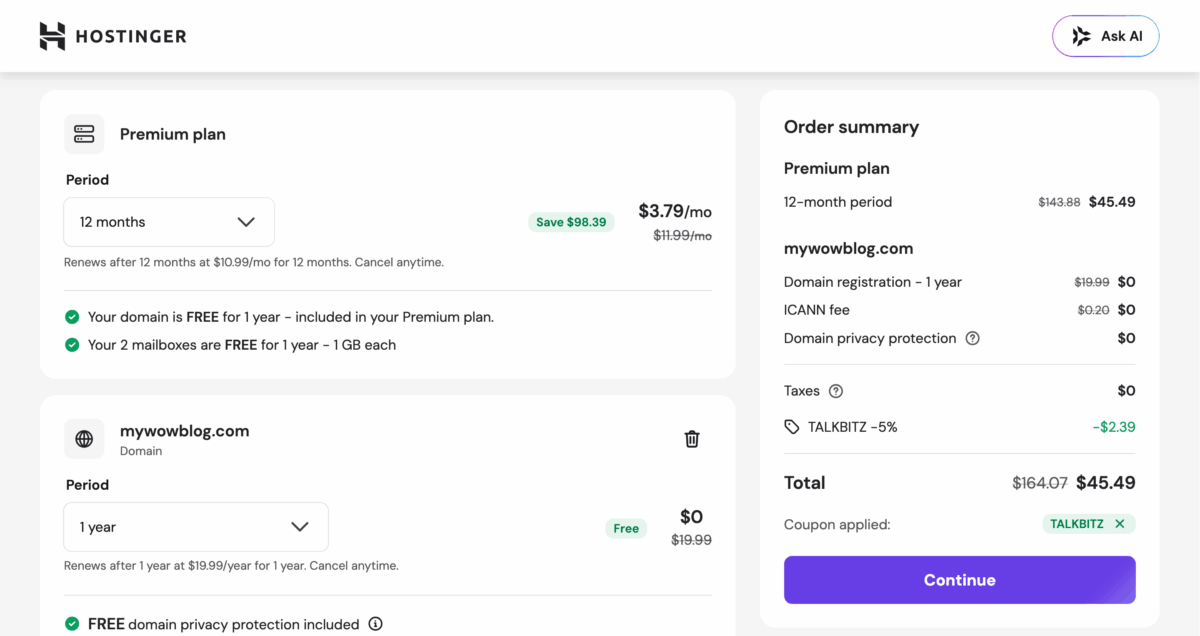
If your preferred domain name is not available, you still have two options. Either try another name or just skip choosing a domain name now to claim the domain after purchasing the hosting package.
After you finish everything and have it ready, simply click the Continue button to continue with checkout and Hostinger will ask you to create your account.
Now, you need to complete your checkout process.
You can sign up with your email, or use Google to make it even faster. Enter your billing details, review your order, and complete the payment.
Once that’s done, Hostinger will walk you through a quick setup wizard before WordPress installs.
First up, Hostinger will ask where you’d like to start. From there, select Create a new site and continue.
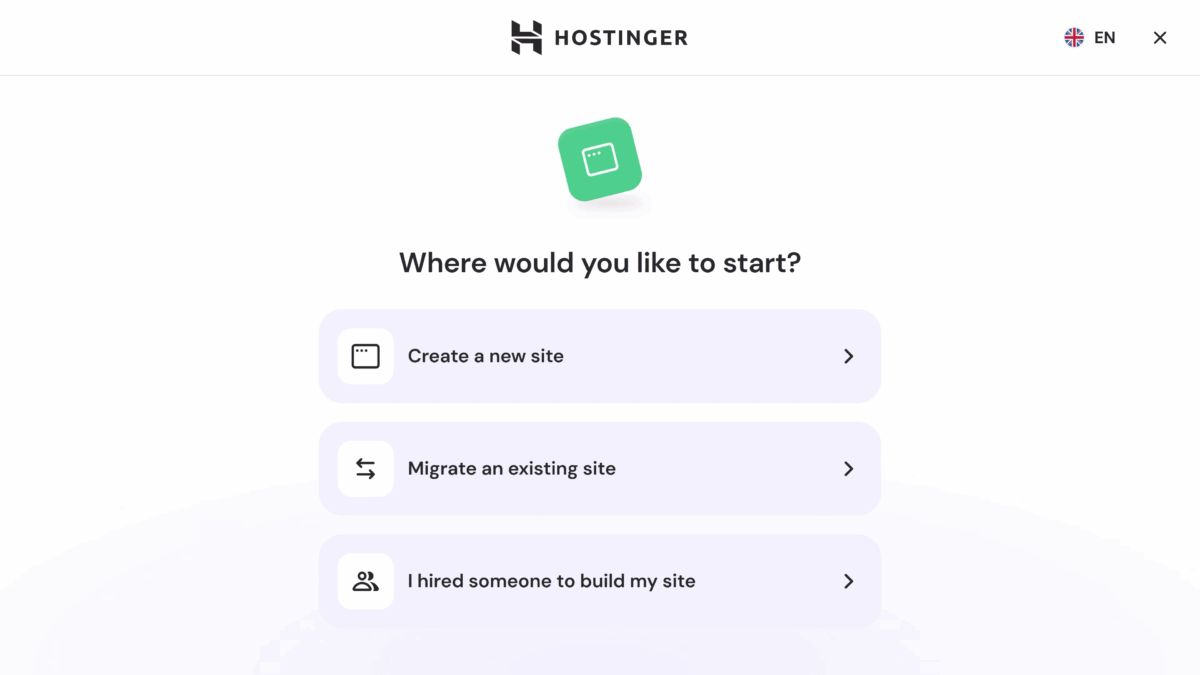
During the setup process, you’ll be asked a few simple questions. Take a moment to answer them based on how you want to create your blog.
During that you’ll also be asked to choose a server location. Pick the one closest to where most of your readers will be.
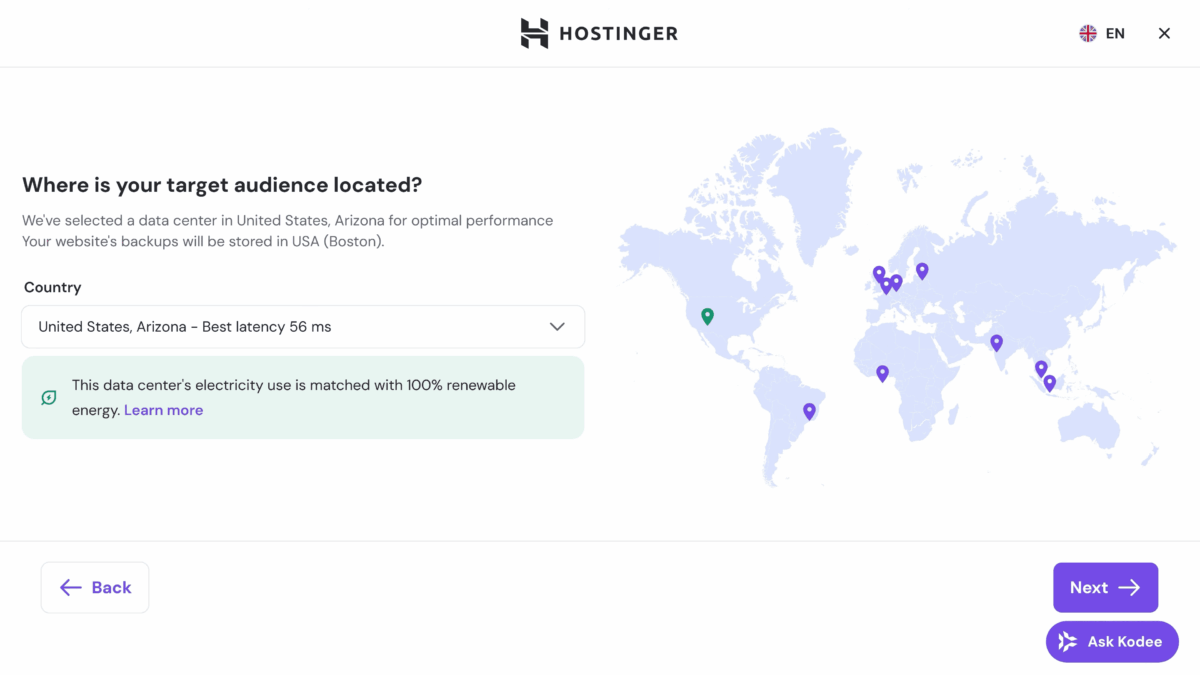
For example, if you’re targeting a US audience, pick a US server and simply click Next. This affects how fast your blog loads for your visitors, so it’s worth getting right from the start.
Next, you’ll be asked to create your WordPress login details. Set your WordPress admin language, enter your email address, and create a strong password.
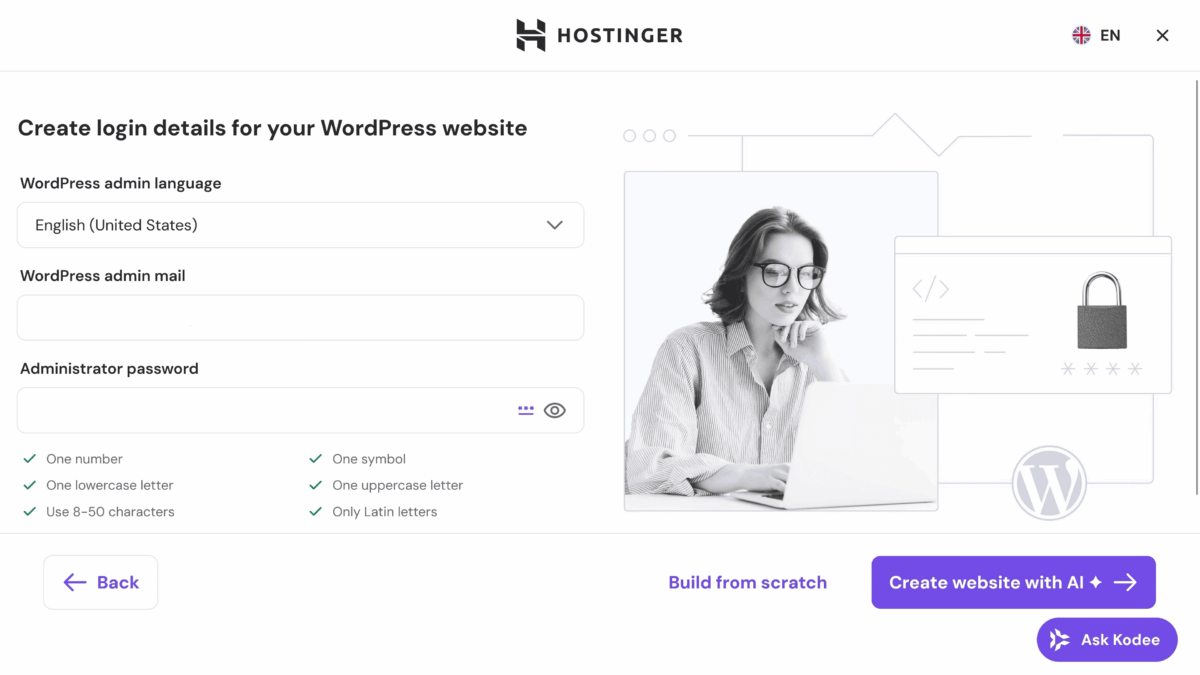
This is your WordPress login, separate from your Hostinger account login you created earlier, so save it somewhere safe.
You’ll also see two options at the bottom: “Create website with AI” and “Build from scratch.” Click Build from scratch so you have full control over how your blog looks and works.
The AI option works, but I wouldn’t rely on it too much. It makes choices for you instead of letting you build things step by step, and some of those choices can be harder to undo later.
After that, Hostinger will automatically install WordPress and send you a verification email to complete your domain registration. Check your inbox and confirm it so your domain and account is fully active.
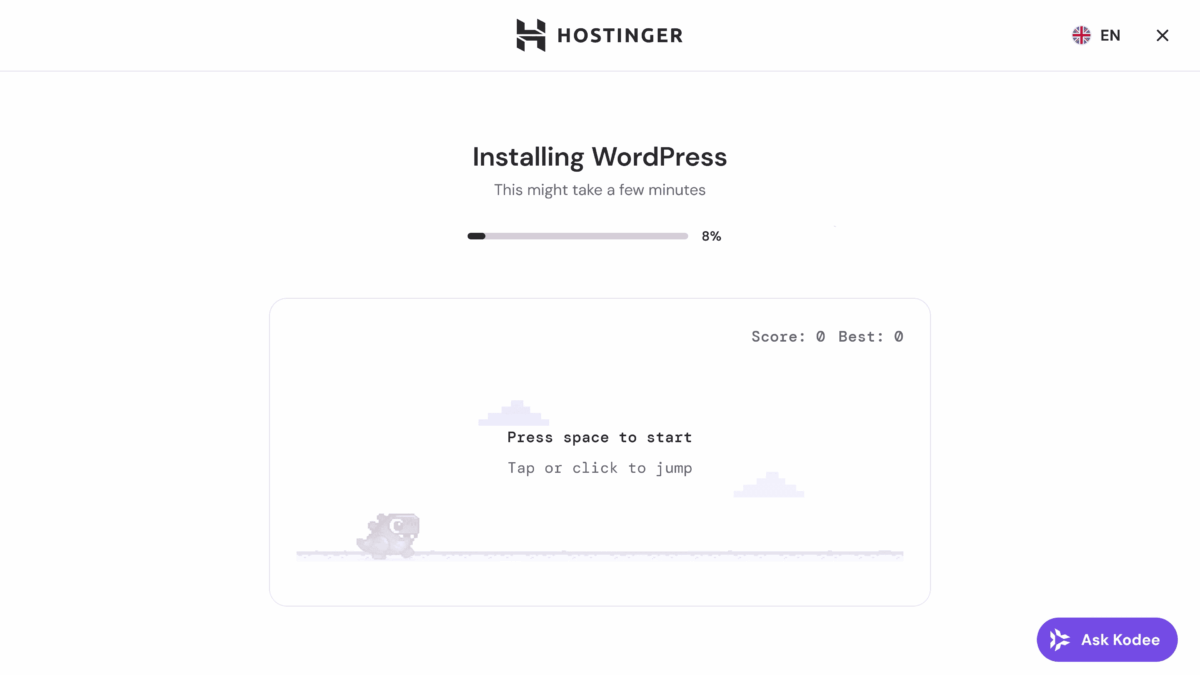
It takes a few minutes. They even have a little game you can play while you wait, but it won’t take so long.
After that, you can access your WordPress admin area. In case you missed it, just go to hPanel and open it from there.
hPanel is Hostinger’s control panel where you manage everything, your hosting, domain, email, and WordPress. It’s much cleaner and easier to navigate than most traditional hosting dashboards. From hPanel, click on “WordPress” and then “WP Admin” to enter your WordPress dashboard directly.
If you run into any problems during setup, Hostinger’s live chat support is available 24/7 and usually gets back to you fast.
Step 5: Your first look around the WordPress dashboard
You can now start building your WordPress blog the way you want.
Just keep in mind that you’ll need two sets of login information:
- Hostinger login details: These are used to manage your hosting account, domain, and email settings through hPanel.
- WordPress login details: These are used to access the WordPress admin area, where you can write blog posts and manage your blog.
But since we spend a lot of time on WordPress, you’ll usually need the WordPress username and password to log in to the WordPress dashboard.
Alright then, welcome to the WordPress Dashboard!
This is where you can share content like posts and images on your blog. We can also add WordPress plugins to give your blog extra features.
You can access this anytime, like I already mentioned, through Hostinger. Log into hPanel and click “WP Admin” under your WordPress installation to go directly into your dashboard.
Alternatively, you can directly access your WordPress admin dashboard by going to yourdomain.com/wp-admin and entering your WordPress username and password.
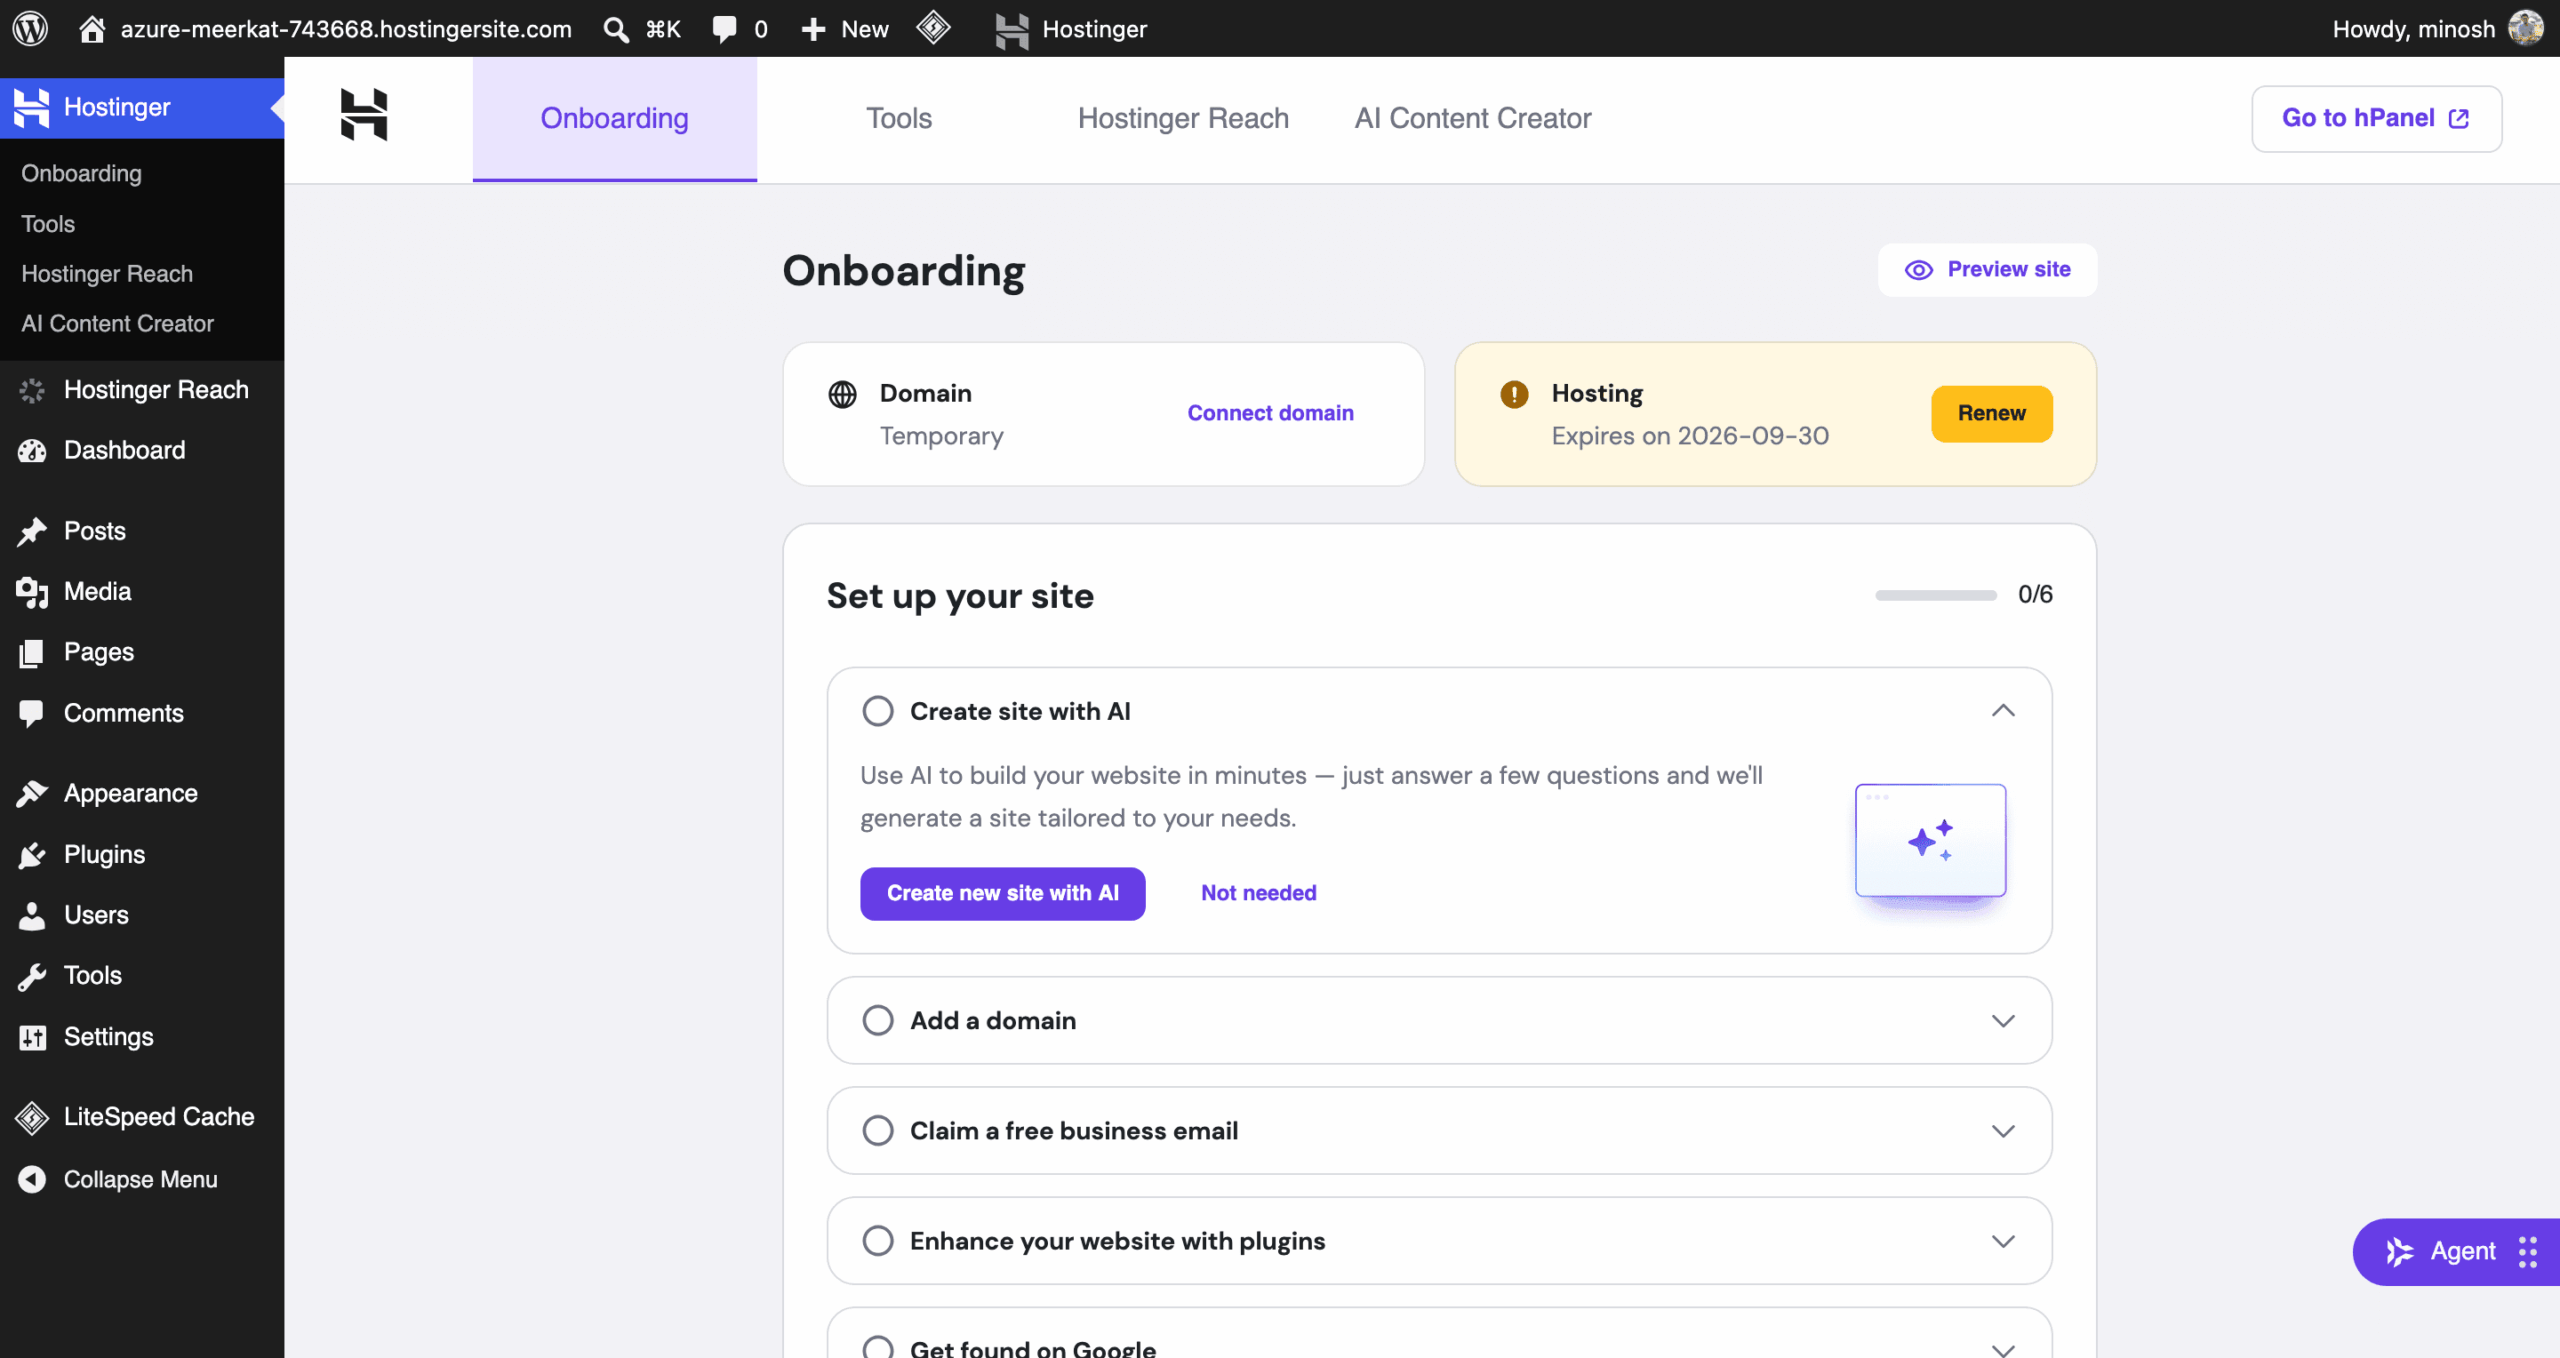
It might seem difficult at first, but it’s actually easier than it seems. I recommend reading our WordPress beginner’s guide to better understand everything.
Here are some settings you should look at to make sure you’re heading in the right direction.
For now, go to Settings > General
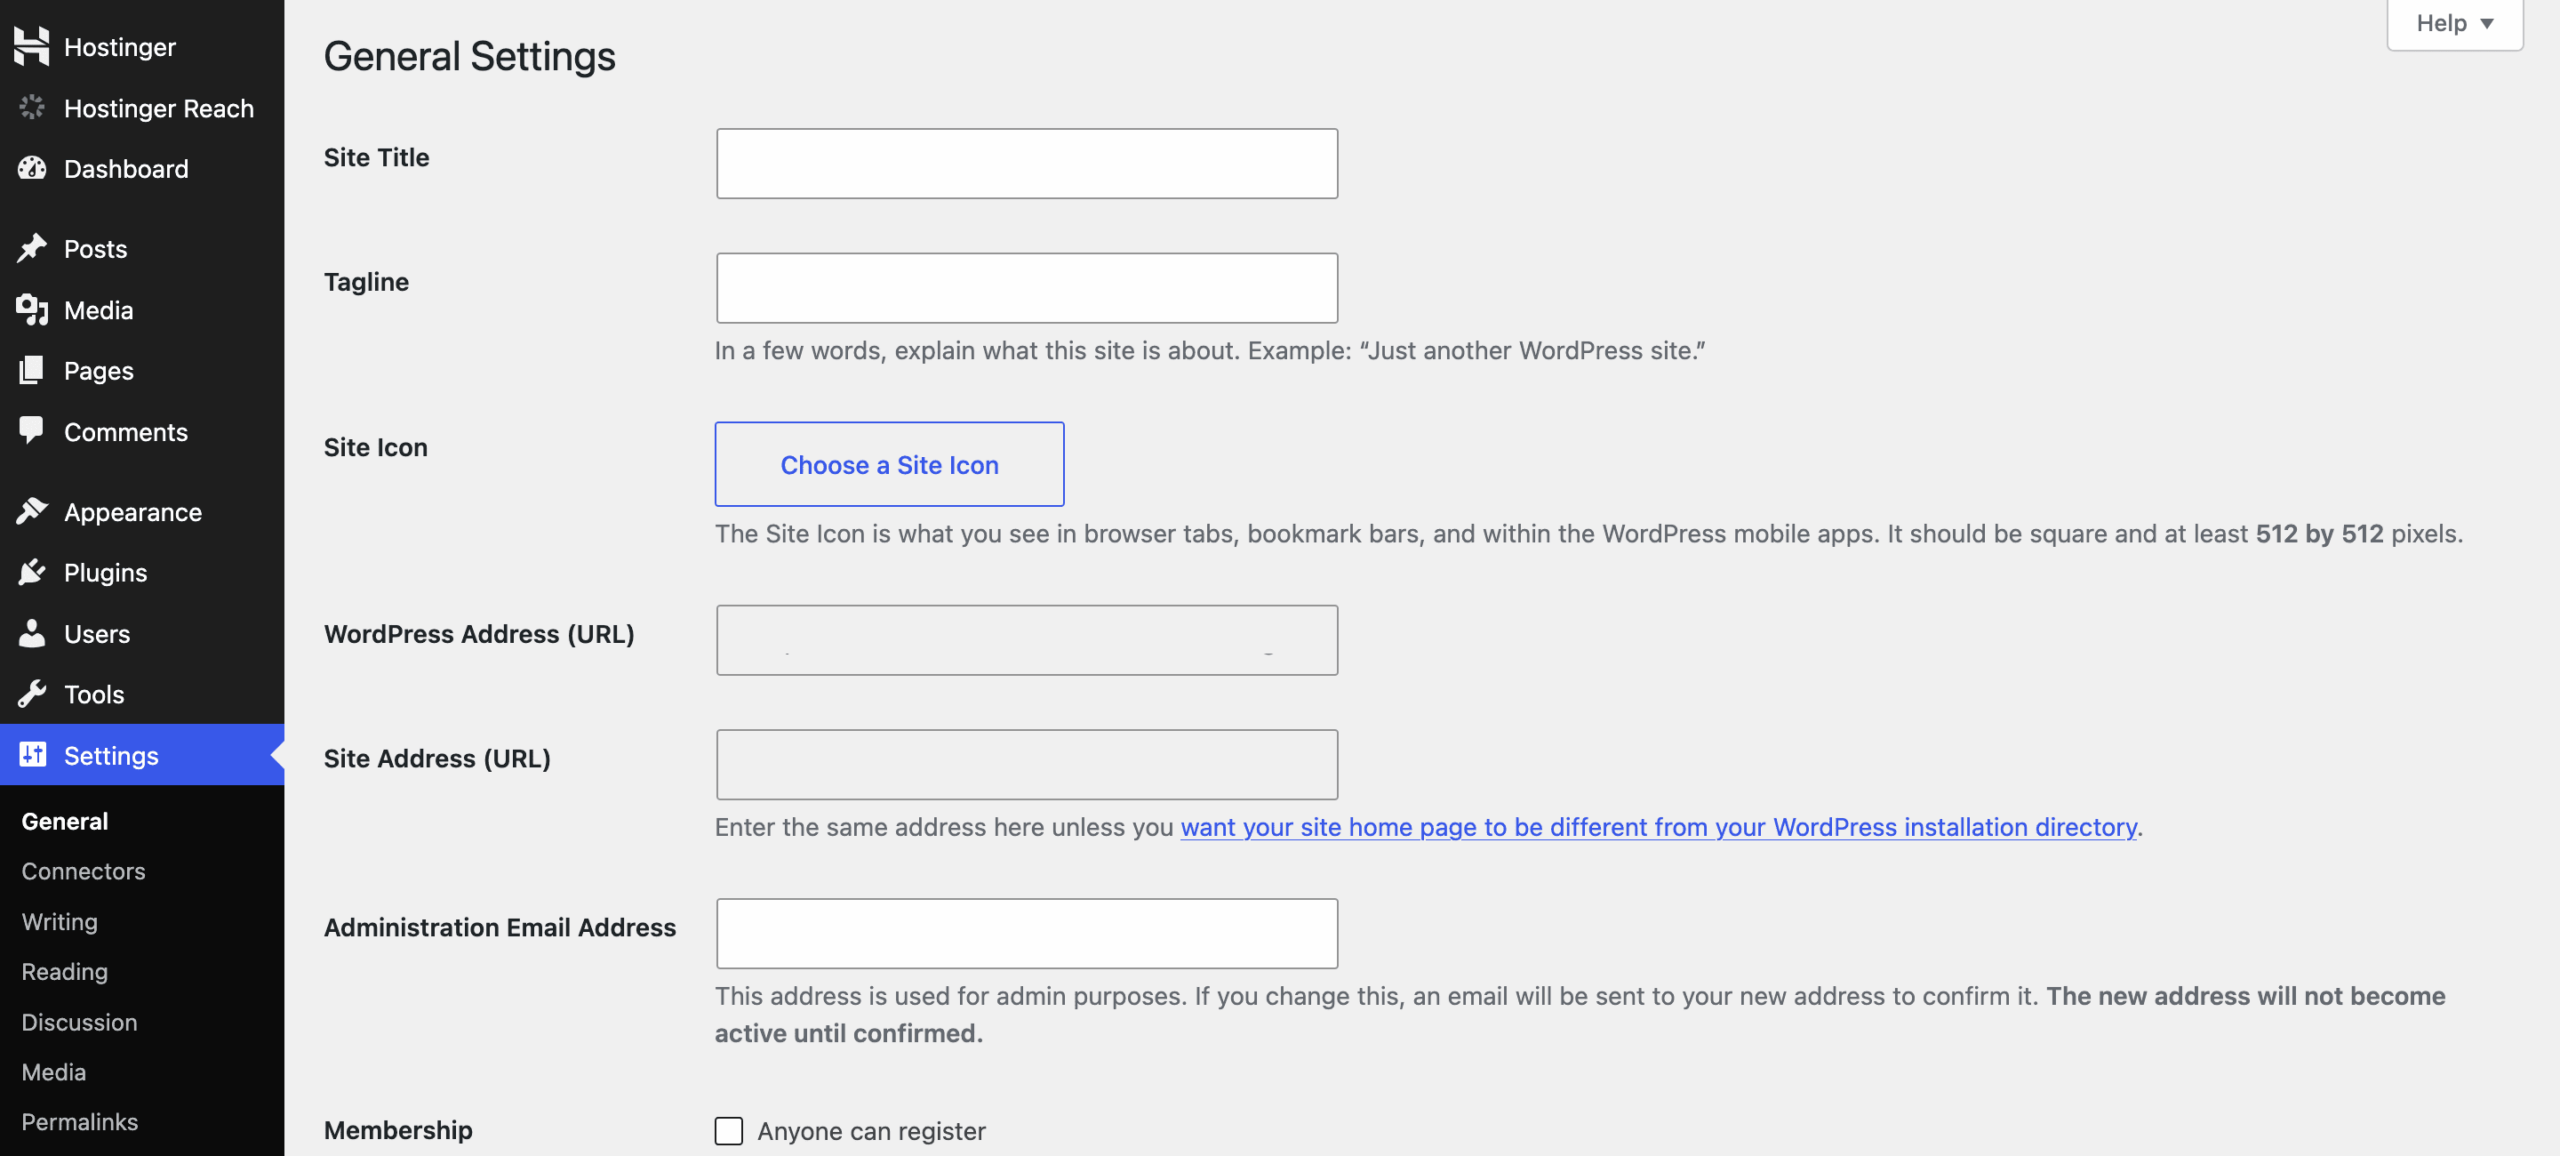
- Site title and tagline: Make sure your site title and tagline are correct. If not, you can edit them here. Your tagline should be a short phrase that describes your site or mission well. These can be modified whenever needed!
- Site address: Make sure it starts with HTTPS:// instead of HTTP://. (If you need help with this, Hostinger’s 24/7 live chat support can fix your SSL in minutes. Just start a chat from your hPanel dashboard.)
- Admin email: You can change the administrator email by entering a new one. If you’ve changed it, you have to confirm it. Make sure that your email is active.
- Membership: Do nothing if you are not going to register new members for your blog. Just leave it unchecked.
- Timezone, date: You can change the time zone as you want. But remember, this will be very important if you are going to schedule blog posts.
Next, go to Settings > Permalinks and make sure “Post name” is selected.
This structure is easy for readers to understand and is suitable for your blog.
Remember to click “Save” if you have made any changes there!
Install important plugins. First, I recommend installing the Yoast SEO plugin. It helps you write blog posts that are search engine optimized, which still matters, just not only for Google and Bing anymore.
AI search tools like ChatGPT, Perplexity, and Google’s AI Overviews are now answering questions directly, so writing clearly structured, content with real details and specific examples helps your blog show up in those answers too, not just in traditional search results.
- What are WordPress Plugins?
- WordPress plugins can help you add more features to your WordPress site. You can install thousands of plugins to add widgets, create galleries, optimize performance, manage bookings, sell products and more.
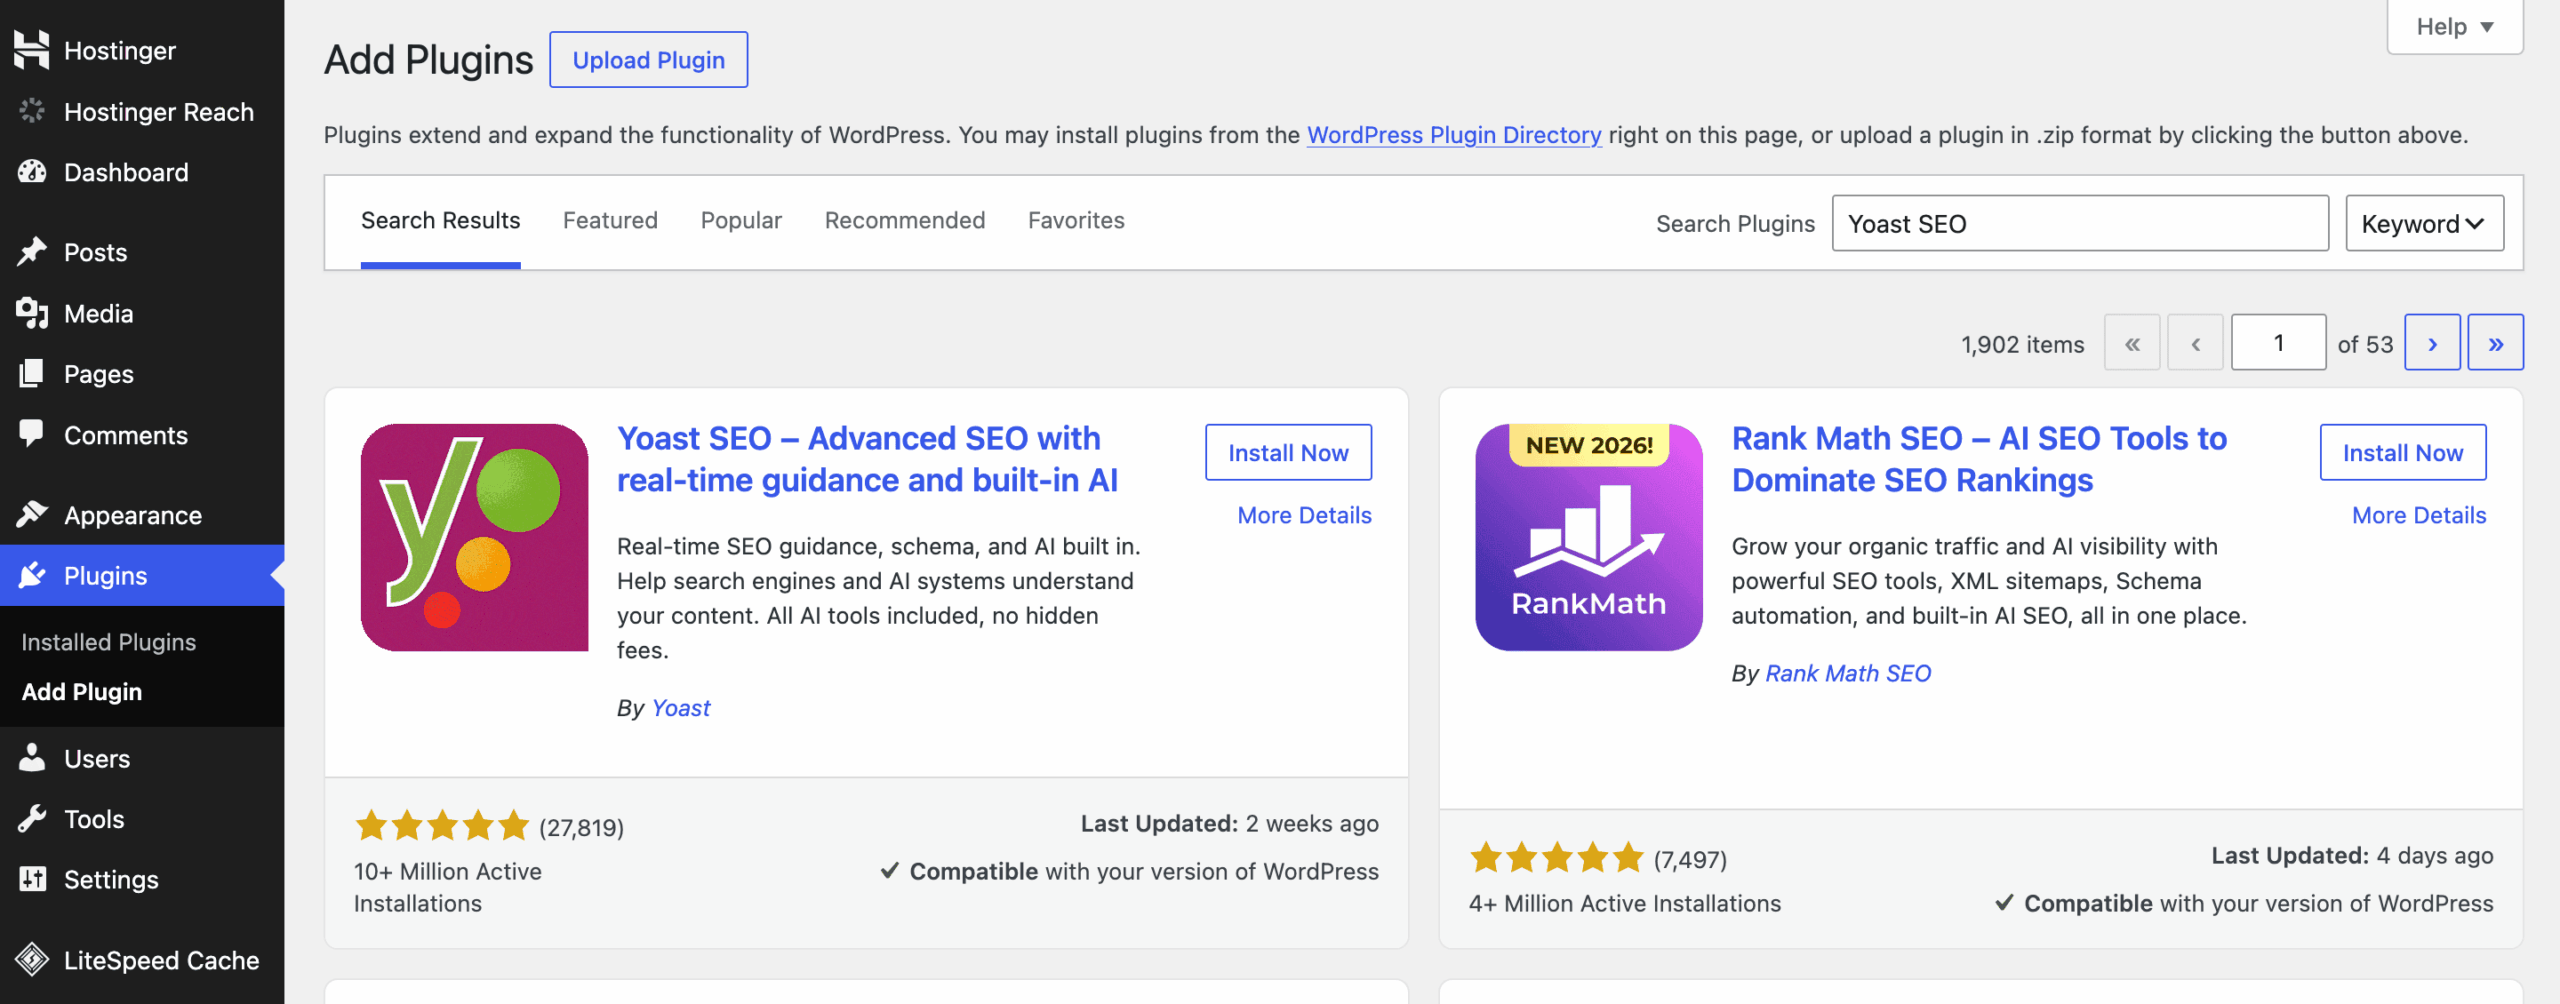
To install a WordPress plugin:
- Go to Plugins > Add New.
- Search for “Yoast SEO” in the search bar.
- Click “Install Now” and “Activate” it.
I recommend installing the Wordfence plugin to secure your blog from attackers and the Contact Form 7 plugin to add a contact form to your blog.
One more I’d recommend is Sharelet, a social share buttons plugin.
I built this one myself because most share button plugins load way too many things than you need and slow your site down. This one doesn’t and takes about two minutes to set up.
For a new blog where you just needed a simple way to let readers share your blog posts on social media, it does the job cleanly.
On the other hand, Hostinger may already install a few plugins by default that you probably don’t need.
Check what’s there, and delete anything you didn’t ask for.
And most WordPress plugins come with a setup guide, so there’s no need to worry.
Step 6: Make it look like yours, then go live
Let’s customize your blog design. You can change your theme to any theme you like.
To do this, go to Appearance > Themes > Add Theme.
From there, you can search for and select your preferred theme.
Alternatively, if you have already purchased a premium theme from a third-party developer, you can upload it there.
- What are WordPress Themes?
- A WordPress theme controls how your blog looks. It includes the layout, colors, fonts, icons, widget areas, header images, background images, and other visual design elements of a blog or website.
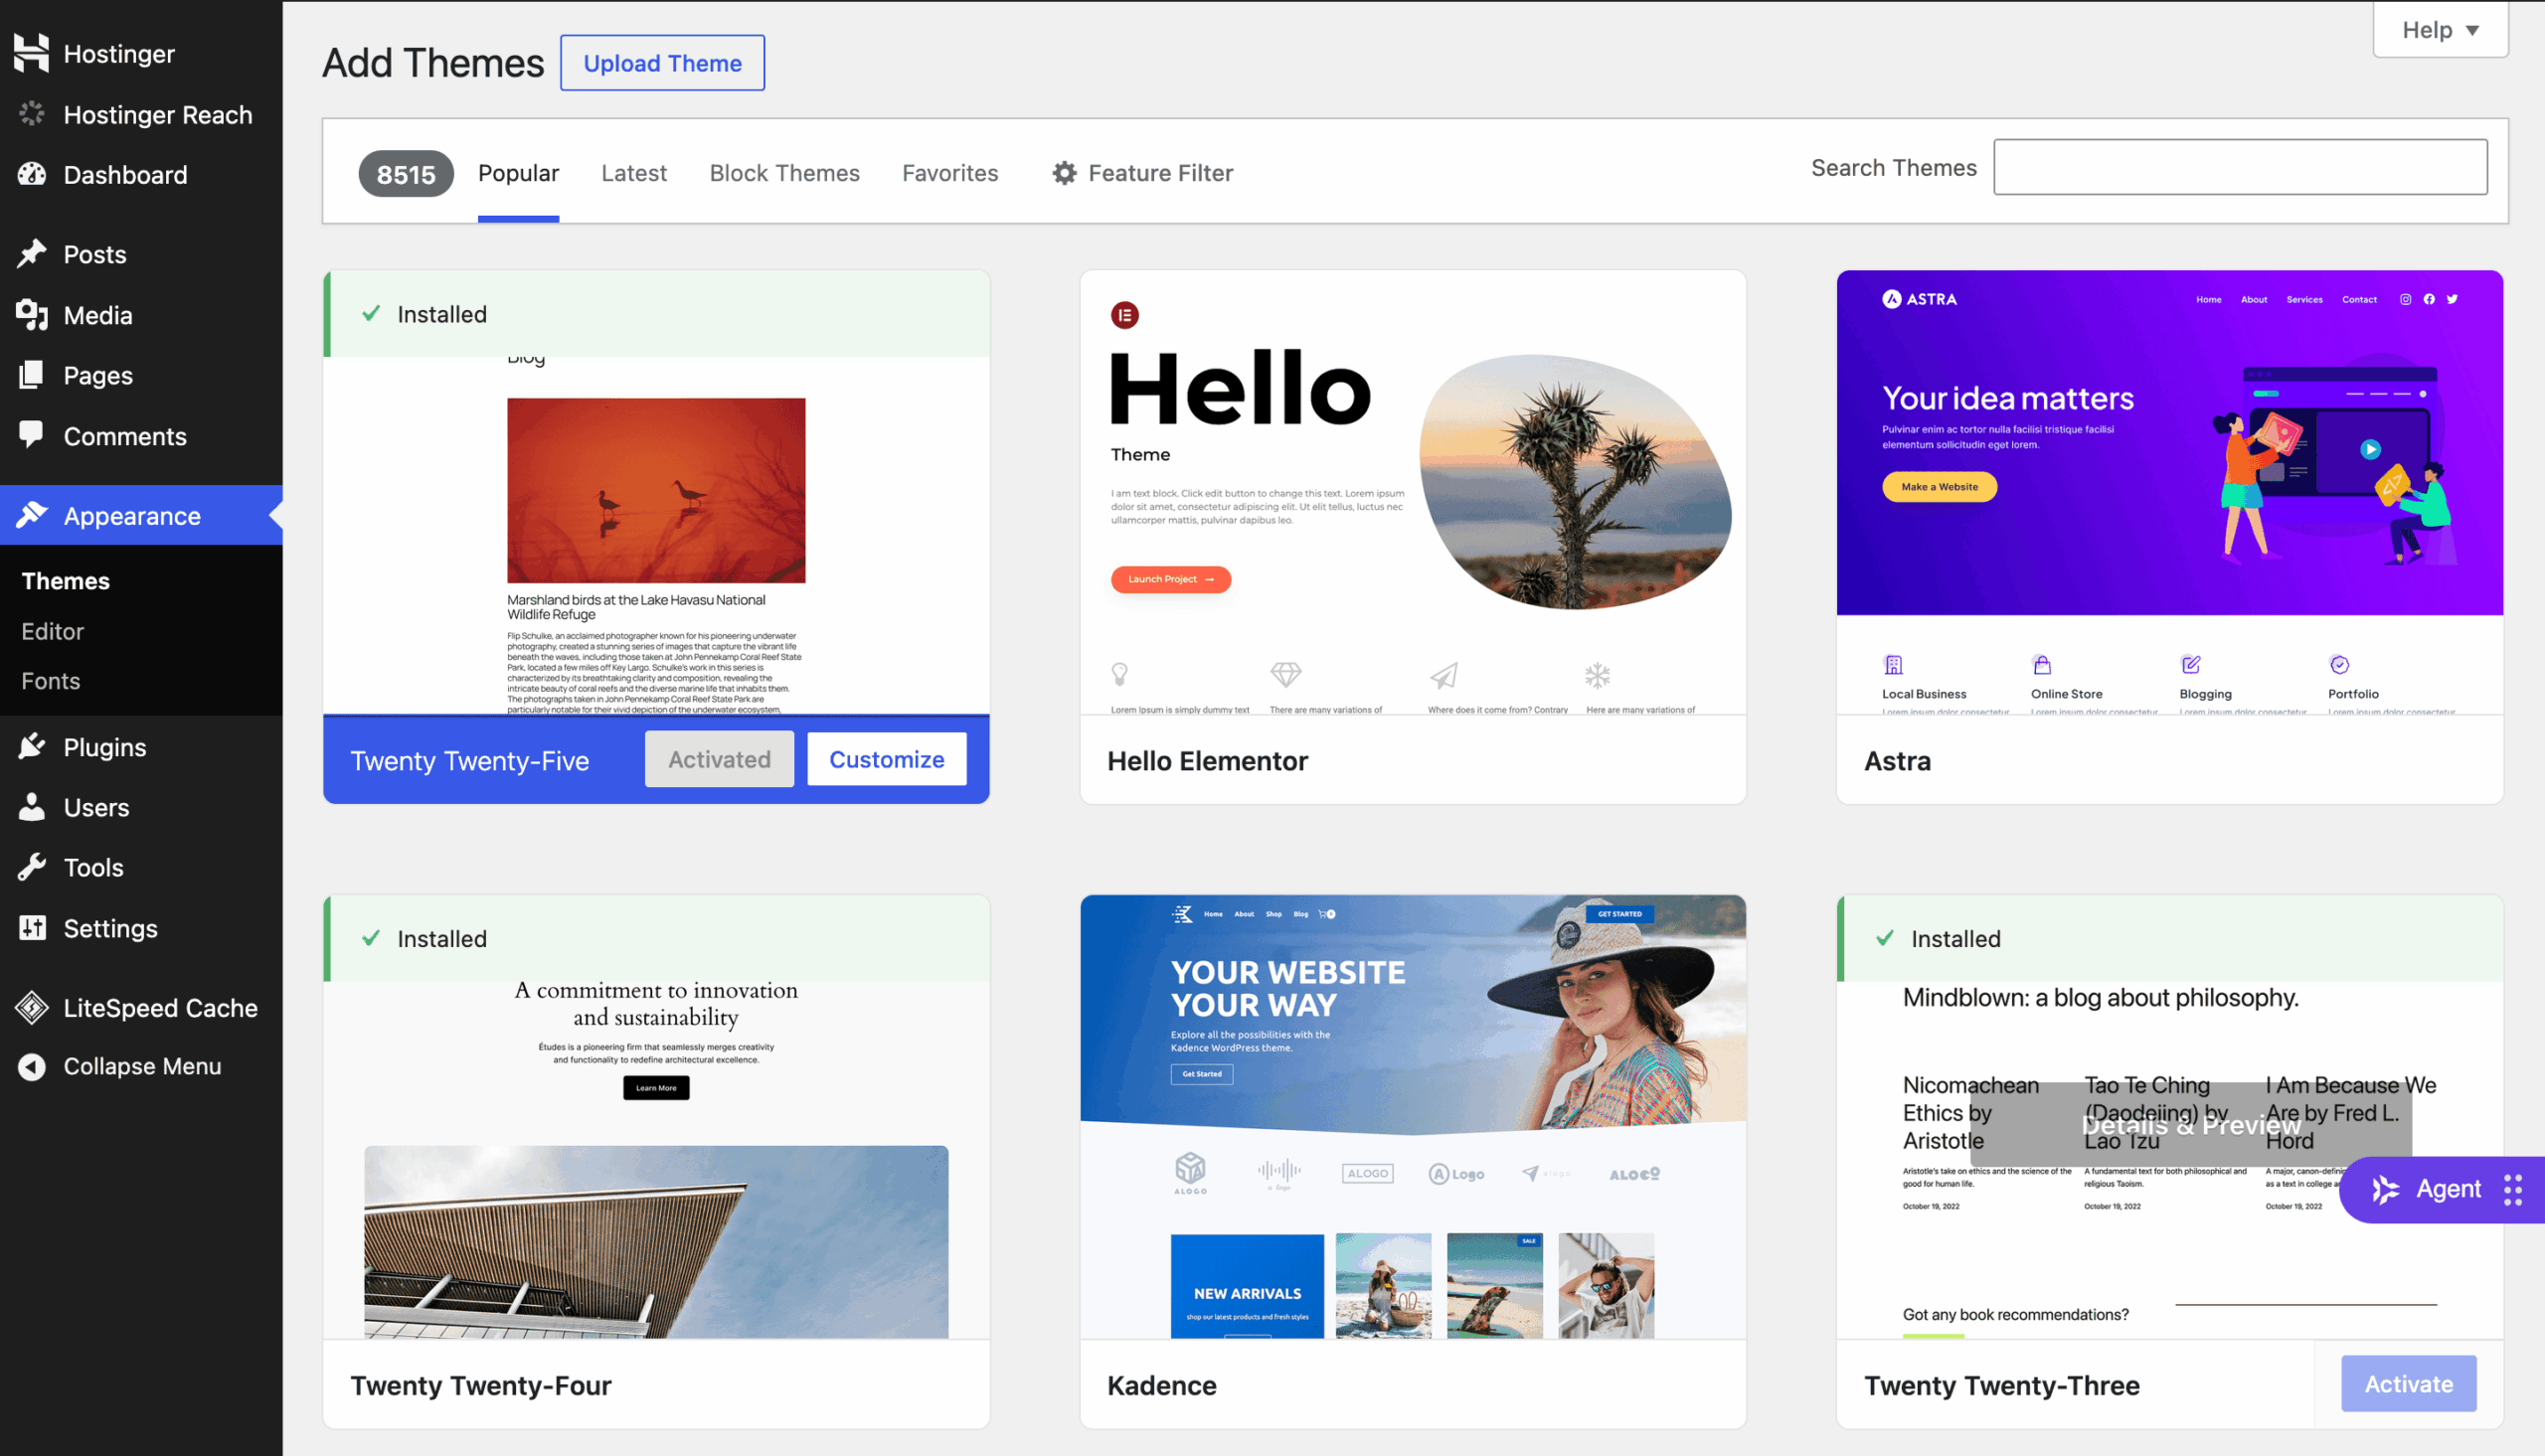
I really like the Kadence theme.
It’s a powerful theme that works excellently on all devices, including PCs, laptops, mobiles, and tablets. It comes with both free and premium versions, with the free version providing a robust set of features for most users.
If you’re looking for advanced customization options, you can upgrade to Kadence Pro on their website.
The best part is they also have a Lifetime Full Bundle, which is a great thing to look out for if you’re planning to run more blogs in the future.
For those who prefer alternatives, the Astra theme is another excellent option with similar features.
Once you’ve selected and applied your chosen theme, navigate to Appearance > Themes > Customize to fine-tune your blog’s look.
The customizer lets you make real-time adjustments to the layout and design of your site.
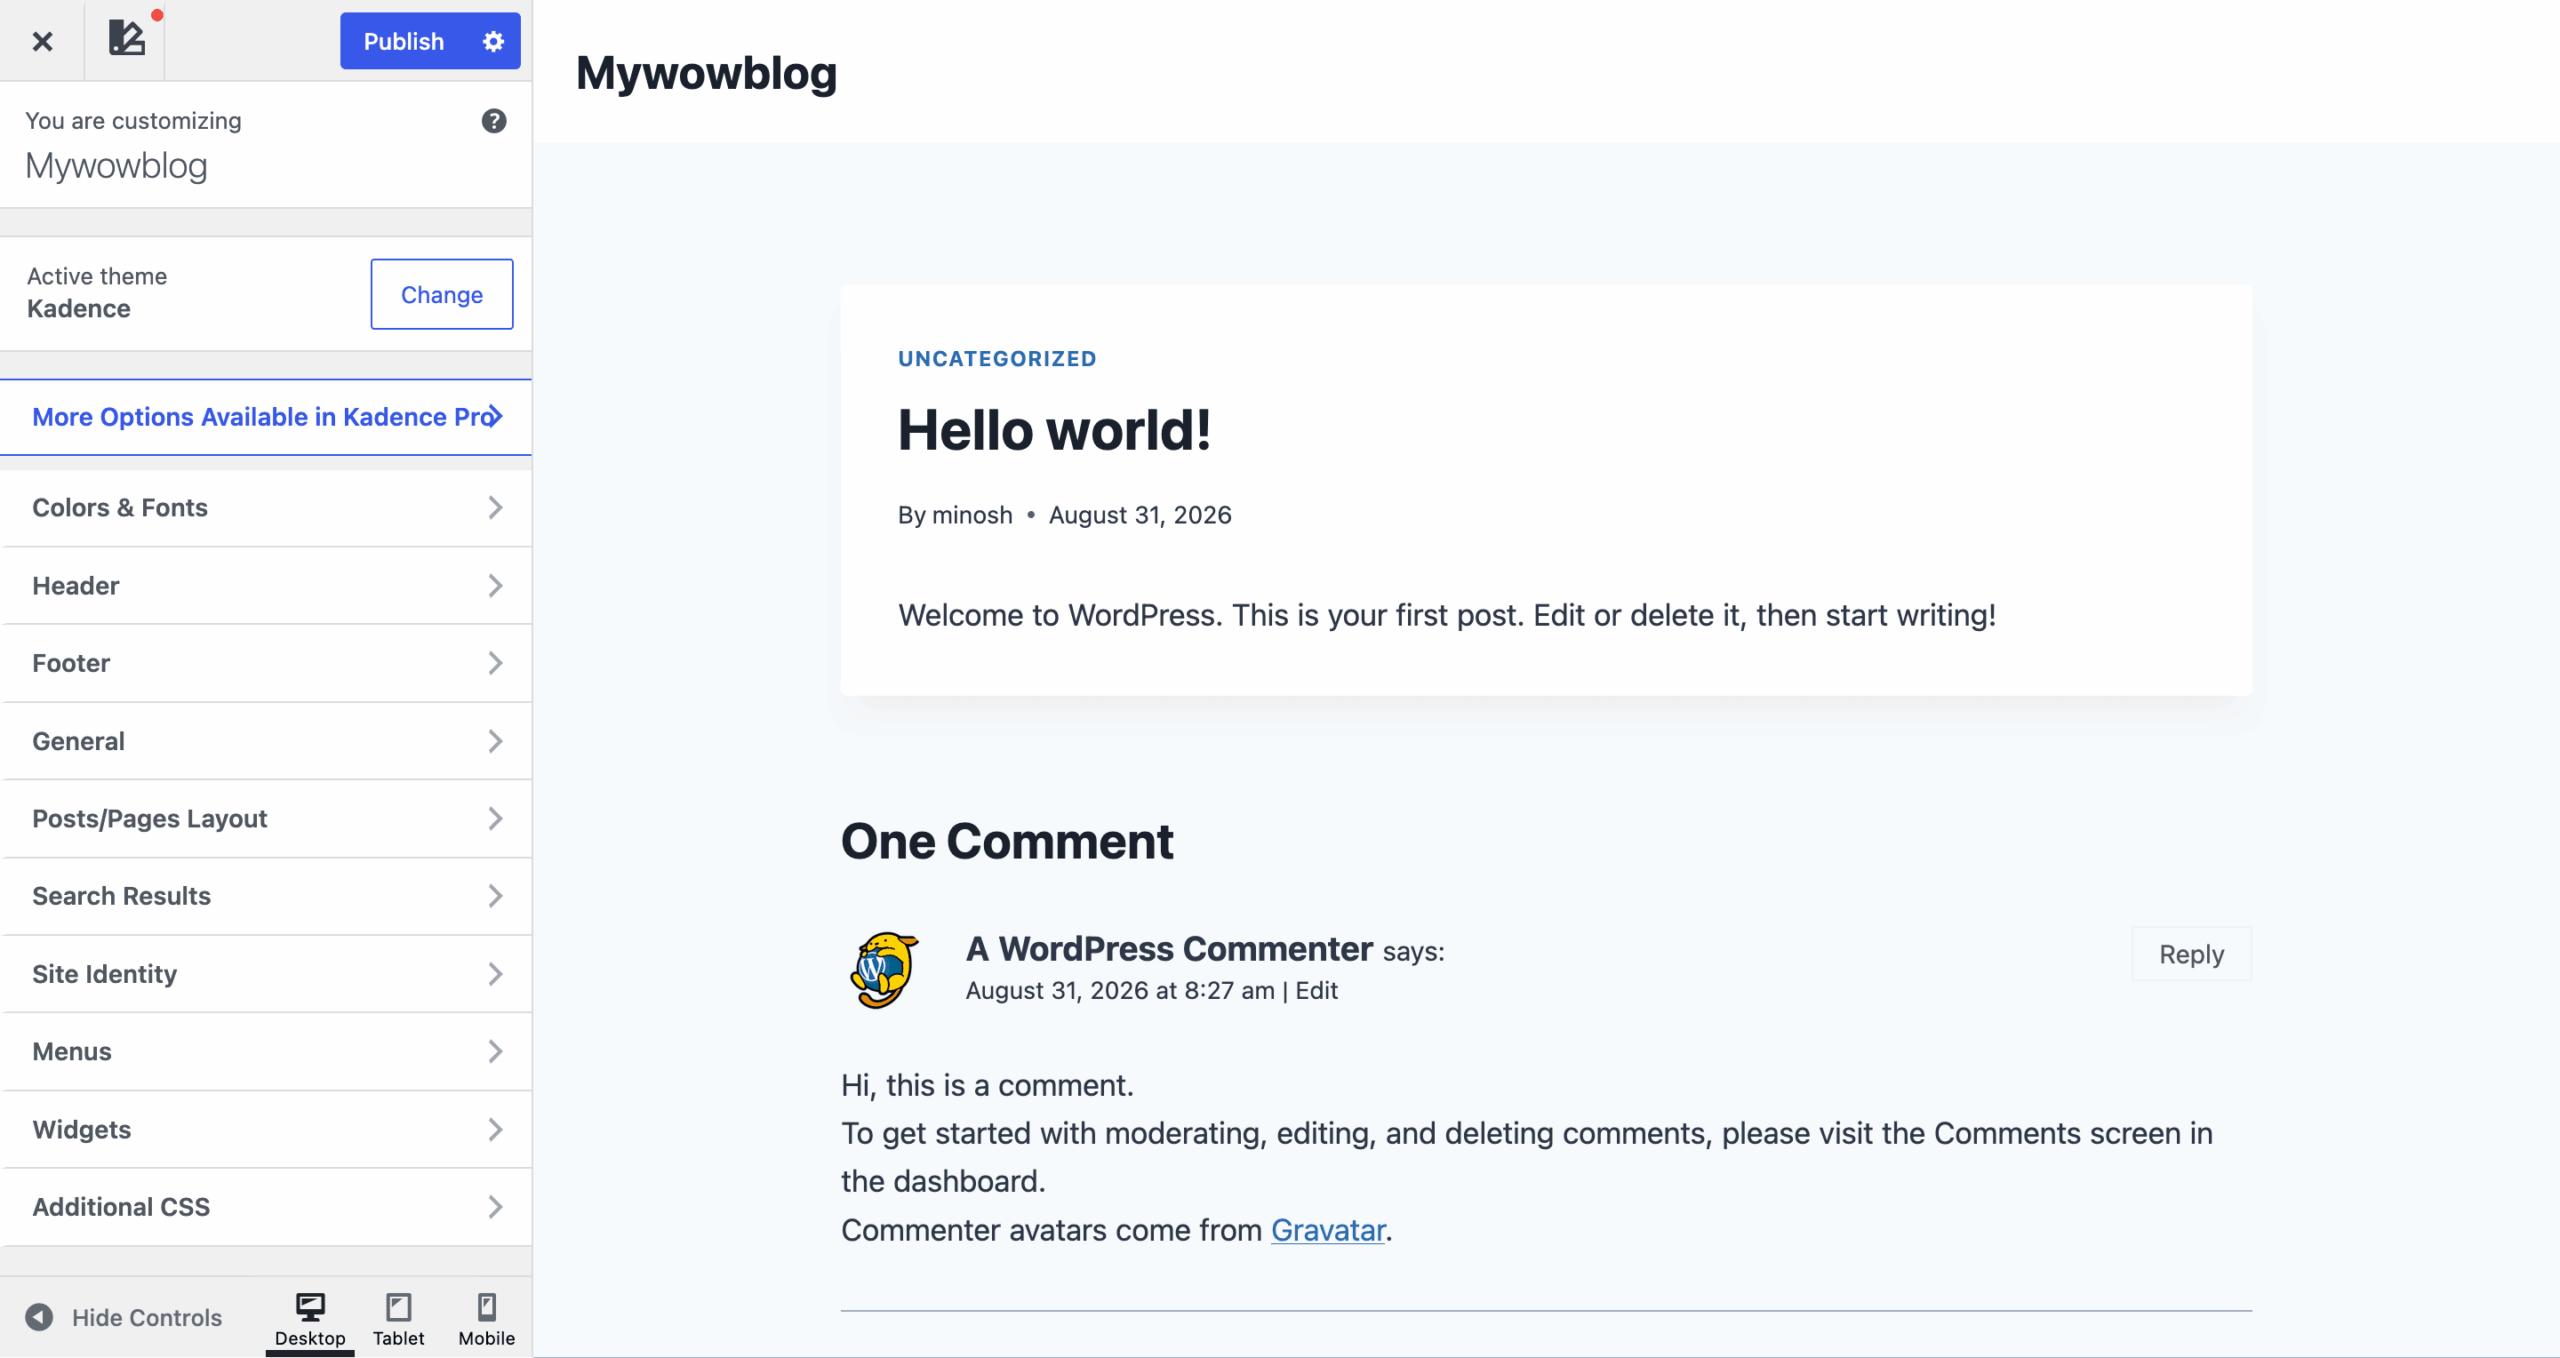
You can customize your site’s header by adding a logo or menu items, modifying the blog layout, adding widgets to the sidebar, and changing the footer area without needing to write any code.
I know that it may feel unfamiliar and overwhelming at first. I’ve been in the same situation as you are now.
Take your time to explore, and you’ll find that it’s easy to learn everything.
Now you can start writing your first blog post. If you’re not sure what to write, just start writing something related to your blog topic.
If you’re feeling a bit lost, don’t worry!
Take a moment to read this guide on how to start writing your first blog post. It’s filled with all the essential details you need as a beginner blogger.
If you’re looking to create a new post, simply head over to the “Posts” section and click on “Add Post.”
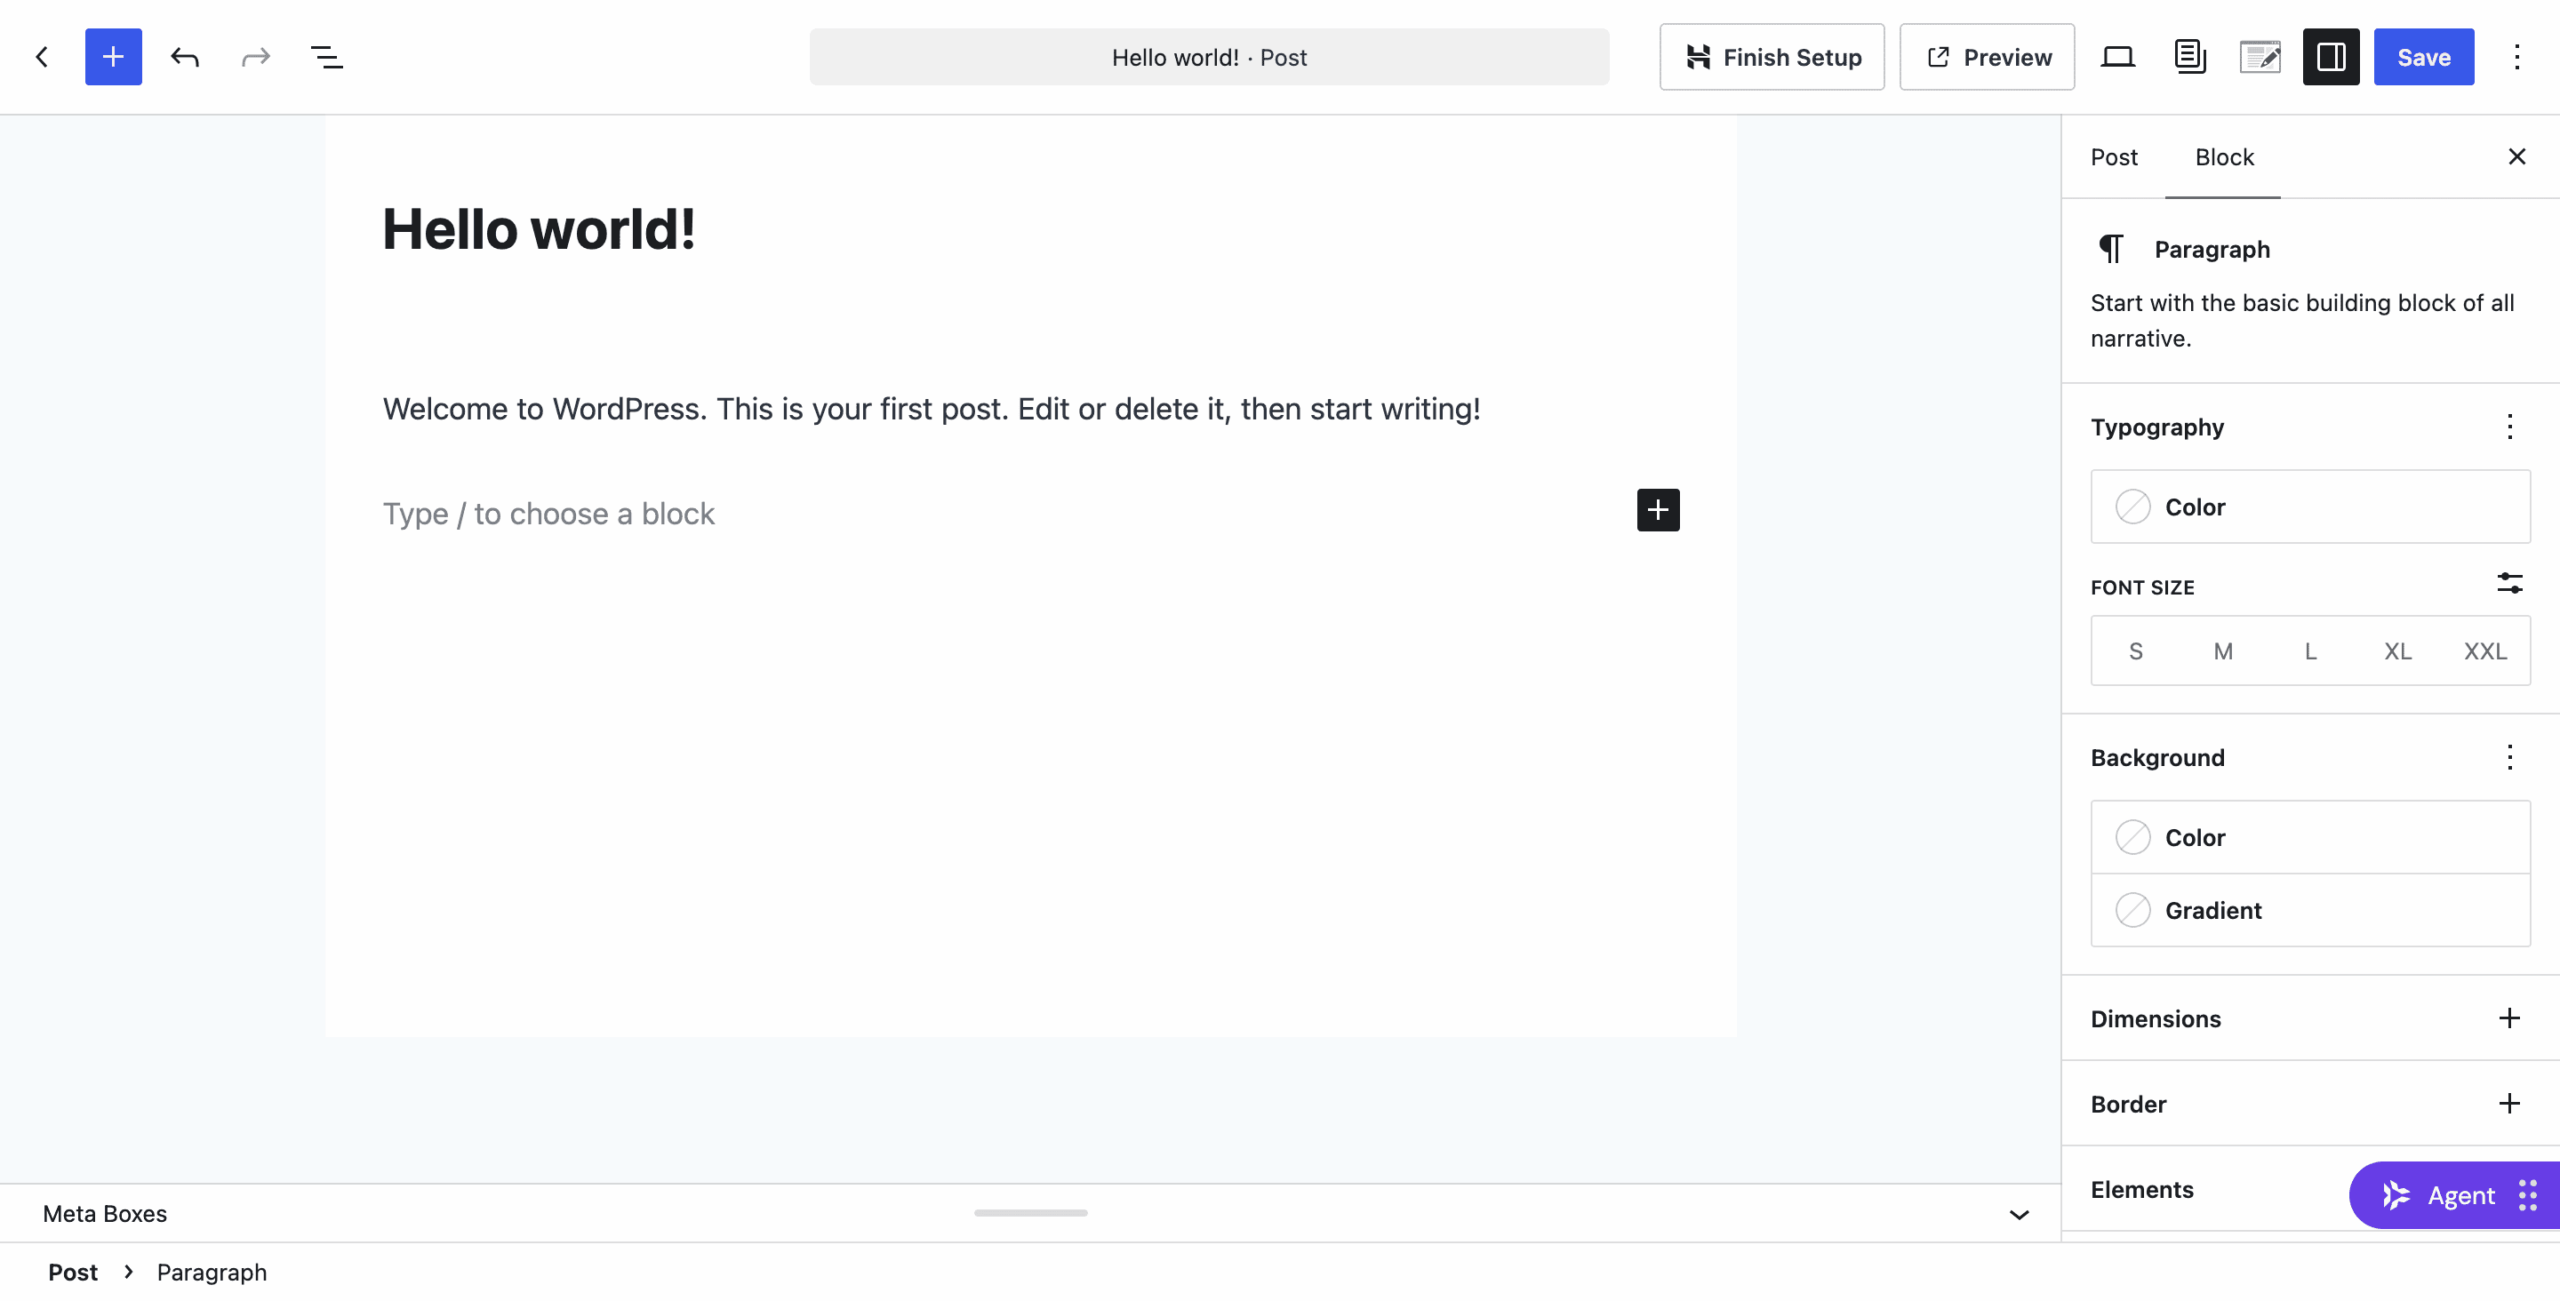
You can edit your blog posts whenever you want, so there’s no need to worry about making them perfect right away.
Also, make sure to include important pages for your blog.
To create a new page, go to Pages > Add Page.
It’s a good idea to have an About Page, Contact Page, Disclaimer Page, Privacy Policy Page, and Terms of Service Page for transparency.
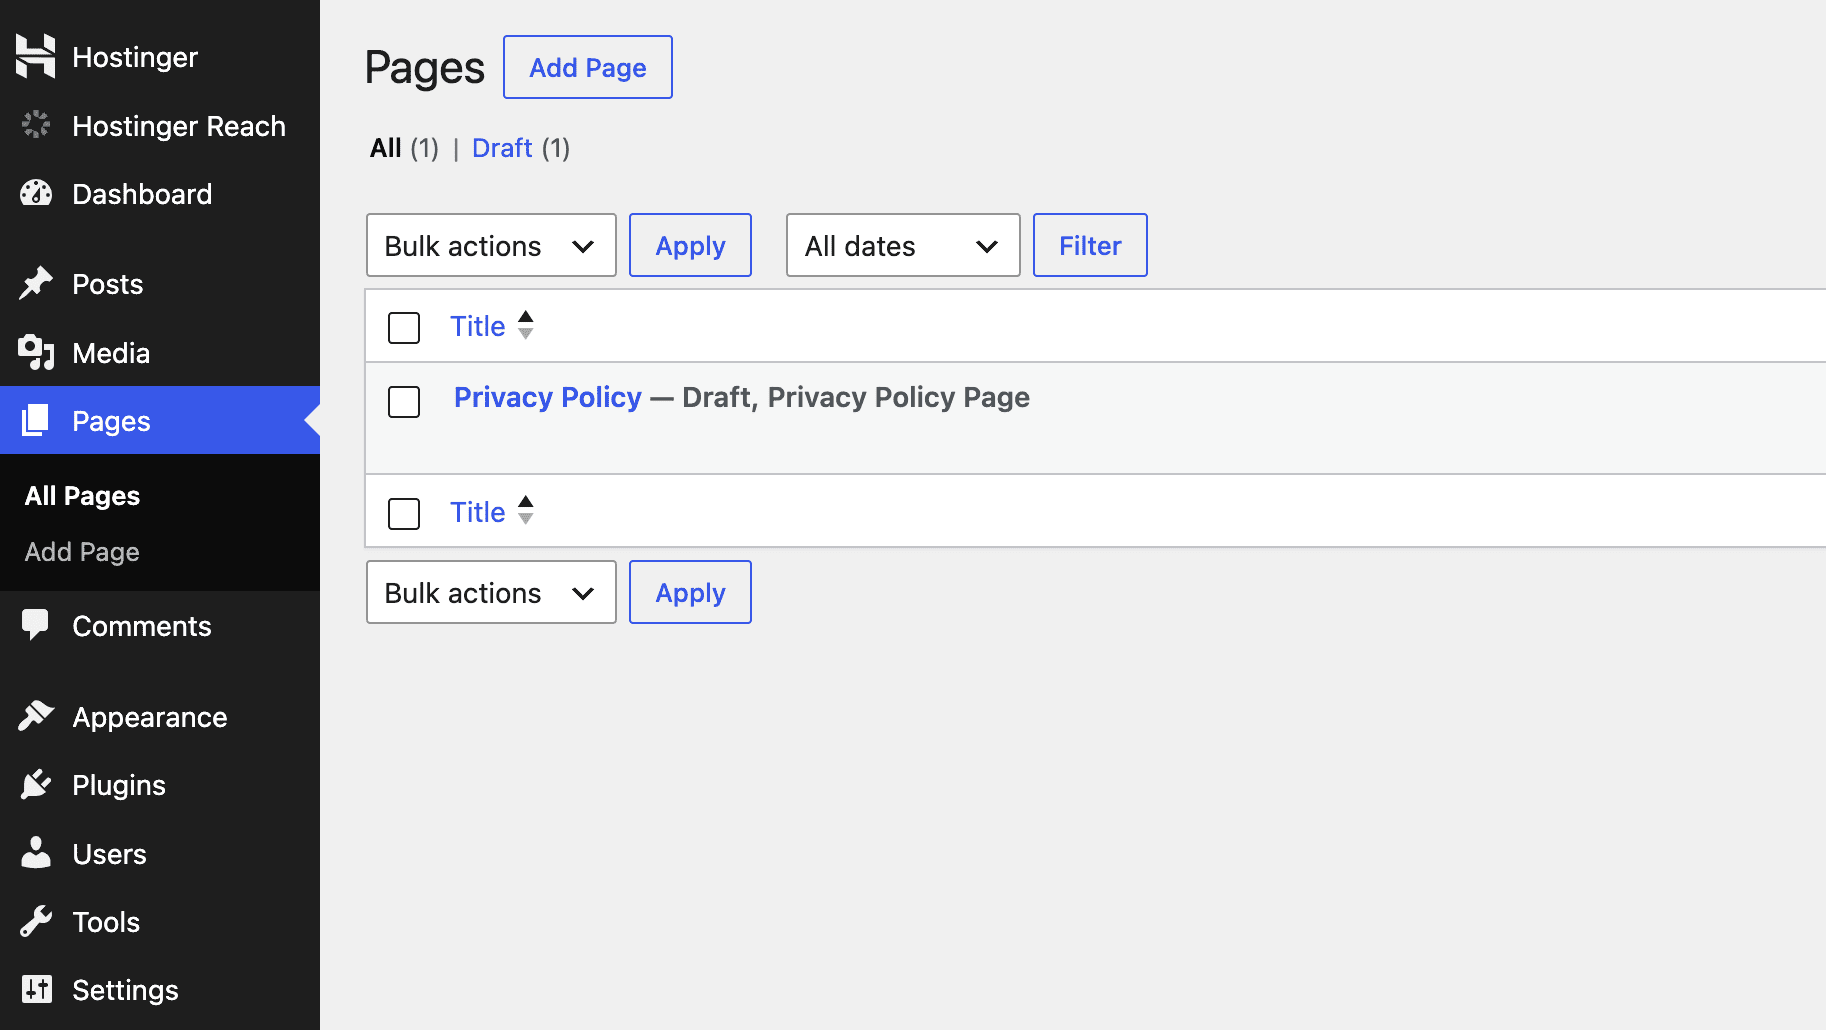
Yes, it can be challenging to create those pages on your own. You can use a website like CookieYes, which generates Privacy Policy pages for you to copy and paste onto your blog.
That’s it. You’re all set.
Now, open a new browser window and enter your domain name to see your brand-new blog in all its glory.
Your blog is now ready to be shared with the world.
Now you have the most popular type of blog, a self-hosted WordPress blog.
However, if you visit your blog address and don’t see your site yet, it might still be in maintenance mode. To fix it, log into hPanel, go to WordPress > Overview, and click the slider next to Maintenance Mode to turn it off. That’s it, your blog should be live after that.
Now that your blog is live, here’s what to focus on
Starting a blog is one of those things most people talk about for months before actually doing it. You just did it.
The next important step is to focus on writing helpful content and attracting a large audience to your blog.
For beginner bloggers, I suggest writing in a way that feels natural to you and learning as you go.
Try different approaches and see what works and what doesn’t.
Look for other blogs and content in your niche to gain a better understanding of your target audience.
Additionally, start sharing your content on Pinterest, as it is a great platform for driving free traffic to your blog.
If you want to learn more about getting started with Pinterest, you can read my article Pinterest for Bloggers.
Most new bloggers often focus on making money right away, but it’s important to prioritize the content of your blog from the start.
When your blog has a valuable audience and does well, you can start making money with platforms like Journey by Mediavine.

The best thing is that getting started with them is so easy, and you can monetize your blog while growing it, meaning even if you’re a beginner blogger, there is a way to monetize it.
However, this doesn’t mean you can monetize your blog and earn thousands of dollars right after launch; consistently creating blog content that helps others is the key to long-term success.
And don’t forget to set up Google Analytics.
This is one of the best tools that Google provides to help website owners and bloggers measure their website performance and traffic.
If you want to set up Analytics on your new WordPress blog, you can do it easily with the help of this guide.
Also, Google Search Console.
This is the place where you can find out how Google sees your blog in its search engine results. If you want to see your blog on Google, you need to set up Google Search Console for your blog first.
It allows you to monitor your site’s performance in Google search results.
Stuck on anything hosting-related? Hostinger’s live chat is available 24/7 from your hPanel dashboard. Most issues get resolved in one conversation.
You can also use the WordPress support forum to learn more about WordPress and get help with a specific theme or plugin.
Now, it’s your turn. You’ve got everything here, you just need to start.
Happy blogging!