Ready to learn how to make a website? Without learning how to code?
Getting online is not complicated anymore.
When it comes to making a website, there are a bunch of website builders out there on the internet today.
With this step-by-step guide, I’ll show you how to do it with a tiny budget without any interruptions or annoying ads.
Let’s learn how to make a WordPress website from scratch, step-by-step!
What's Inside
How to Make a Website in 3 Steps
Whether your website is a simple or fully functional website, you should go through the 3 main steps to make it accessible, user-friendly, and functional.
Put simply, you’ll need to have a domain name (yourwebsite.com) and a web hosting service to make your website fully accessible to others.
When you have a domain name and hosting, you can make a website. This means you’re going to build a self-hosted website. Self-hosting is when you pay a web hosting company, and they’ll store your website and make it available to the public.
Step 1: Choose a Website Platform
WordPress is the most popular website content management system. The new data reveal that it is used by 43.5% of all websites on the Internet.
So we’re going to get a domain name + web hosting and use WordPress to bring your dream website alive.
Once you’ve finished this guide, you’ll have a fully working self-hosted WordPress website with a custom domain name!
Ready? Let’s get started!
Step 2: Get the Domain Name and Web Hosting
Put simply, web hosting is a service that stores your website and its files on a secure server that is always connected to the internet.
Thankfully, Bluehost offers great web hosting packages to start your WordPress website seamlessly.
→ Click here to head over to Bluehost and hit the big “Plans and Pricing” button

The first thing is that you need to select one of the web hosting packages you prefer. I recommend you select the starter package because it’s more than enough when you’re just getting started.
If you’re planning to build more than one website in the near future, you can also select any other higher package, but you can always upgrade your package later if you need.

Moreover, it comes with a 30-day money-back guarantee, so there’s no risk in purchasing web hosting when you’re creating a website with Bluehost.
The next thing is that you need a domain name.
Your visitors will use this address to find your site through their PCs, laptops, smartphones, etc.
My domain name is talkbitz.com. You can choose any name that you’d want to be your website’s domain name.
If your choice isn’t available right now, you can click the option “Choose domain later” to set up a domain after you purchase the hosting package.

They offer a free domain name and an SSL certificate for the first year, and it will also help you get web hosting on a tight budget.
If you’re wondering what an “SSL certificate” means, it will secure the communication between your visitor’s browser and the HTTPS-enabled website (That’s your website).
In other words, the padlock icon appears on the left side of your web browser’s address bar.
Furthermore, watch out for pre-ticked domain privacy protection.
When you register a domain name, your details will be stored in a public directory.
This will help you keep your personal information protected from public access and replace it with generic Bluehost contact information instead.

As you can see, even though they clearly show what it is, it charges you an extra amount.
If you want to remove it for now, you can activate it later from the Bluehost dashboard.
Or, you can simply click “Choose domain later” and register a domain somewhere else, like Namecheap, for a super cheap price.
Later, connect it to your Bluehost WordPress site (that’s not too hard if you follow their guide).
Once completed, picking a domain name (or choose to do that later), you need to choose your web hosting account plan.
You can choose a plan for a period of 1 month, 12 months, or 36 months upfront.
When you pay for 12 months, your first-year cost will be just $57.48, and you’ll get web hosting for 1 year with a free domain name and a free SSL certificate.

On the other hand, you can also go monthly, which is $15.99 (and you don’t get a free domain from Bluehost), or 3 years, which they advertise as $3.79/month, totaling $136.44.
My best recommendation here is to go monthly if you are just starting, and if you have a long-term plan, go for maybe a 1-year or 3-year plan as you wish.
You also see some extra addons, which are not that important at first. You don’t need them to be added to your cart. If something was added, just double-check and remove anything else you really don’t need.
After you review your cart carefully, you’ll need to sign up for Bluehost to get your domain name and web hosting and start building your website.

It’s time to purchase your web hosting package. Enter your billing information correctly, give a password for your Bluehost account, review the Bluehost Policies and Terms, and then hit the “Submit Payment” button!

This will take a moment for your purchase to be processed, and you’ll receive an email containing your confirmation, order summary, and login credentials.
If everything looks good, you’ll see WordPress start installing by itself.
(At this time, if you see a WordPress setup wizard, answer those questions, and it will take you to the WordPress installation.)
Now, you may need to log in to your Bluehost account. Use the password you just created in the above step and check your inbox to find the user ID that Bluehost sent you.

Now you’re all set! Let’s start building your website!
If you’re experiencing any issues up to this step, don’t hesitate to reach out to Bluehost support for help.
They also have a knowledge base filled with guides, instructions, and answers to common questions.
Take advantage of those valuable resources.
Step 3: Set Up and Design Your Website
I hope now that you’ve got your new website alive, it’s time to make it feel more attractive with the design, customization, and some branding stuff.
Simply, go to your WordPress dashboard to start customizing your website.
You can find it at yourwebsite.com/wp-admin. (Check your inbox for login details.)
Or you can access your WordPress site through Bluehost. After you log in to your Bluehost account, navigate to “My Sites” and select your WordPress site to start customizing.
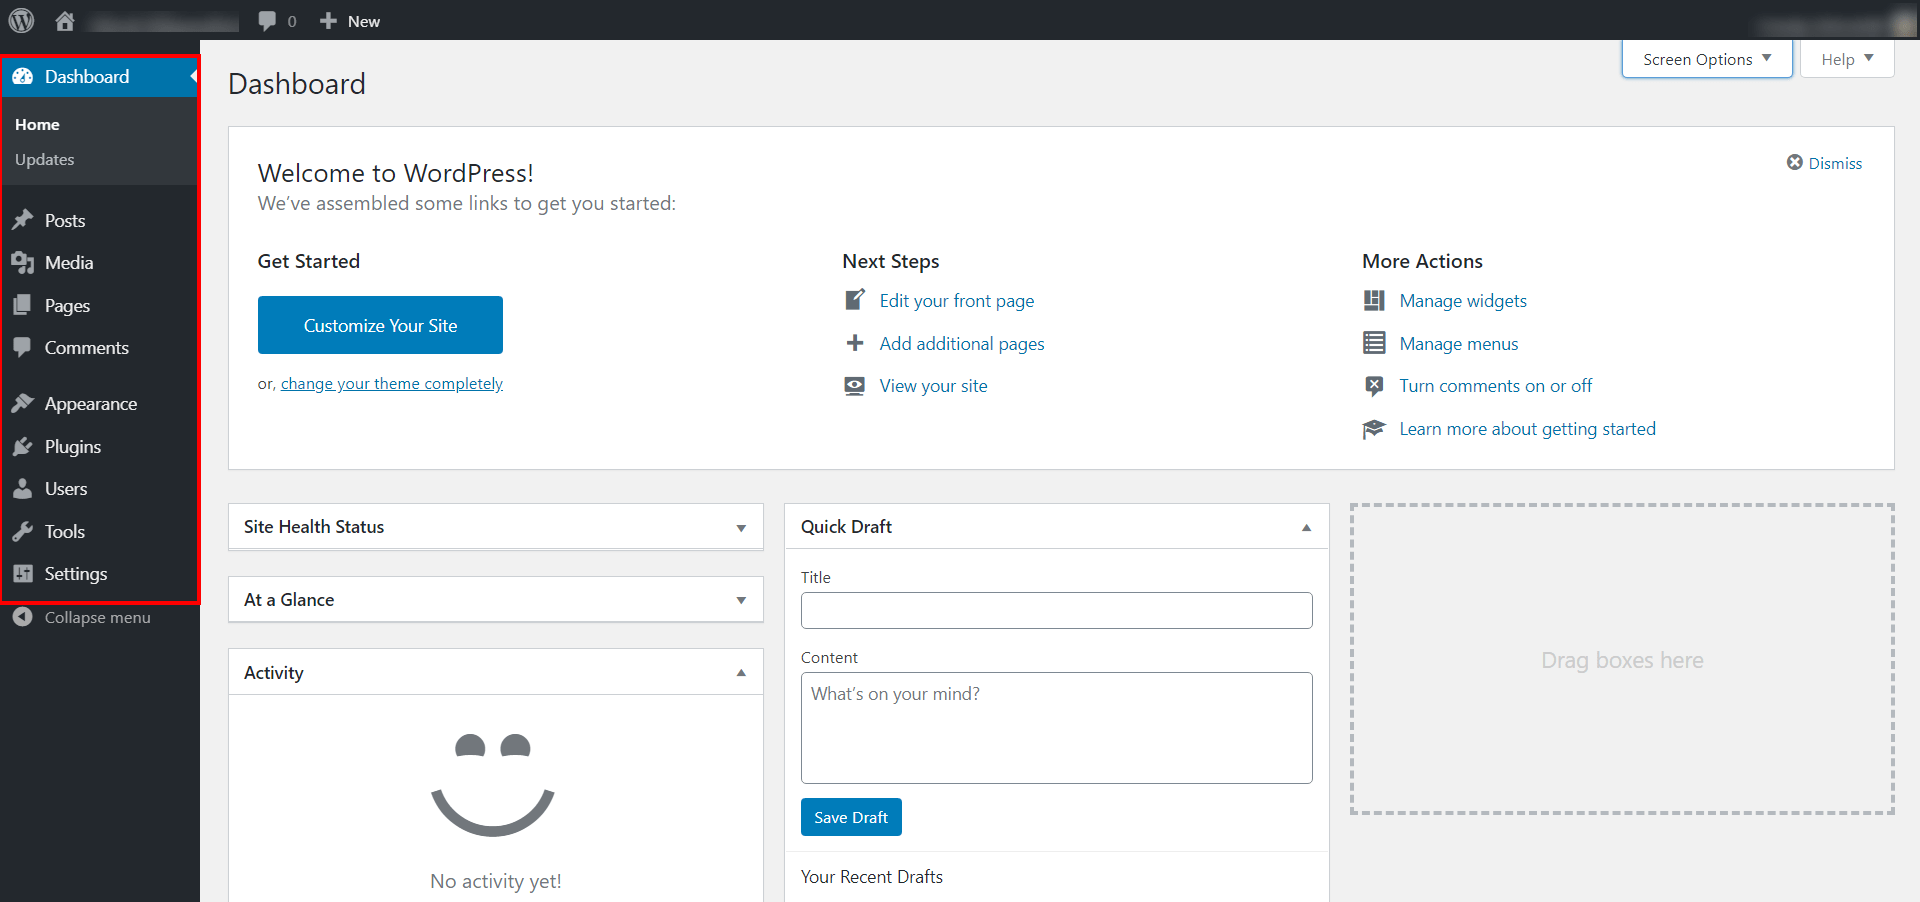
The WordPress dashboard is the one you need to create content and customize your website.
To get a clear idea about how to use this properly, you can head over to our WordPress Dashboard guide.
Once you’ve logged in, you can see your WordPress dashboard like this:
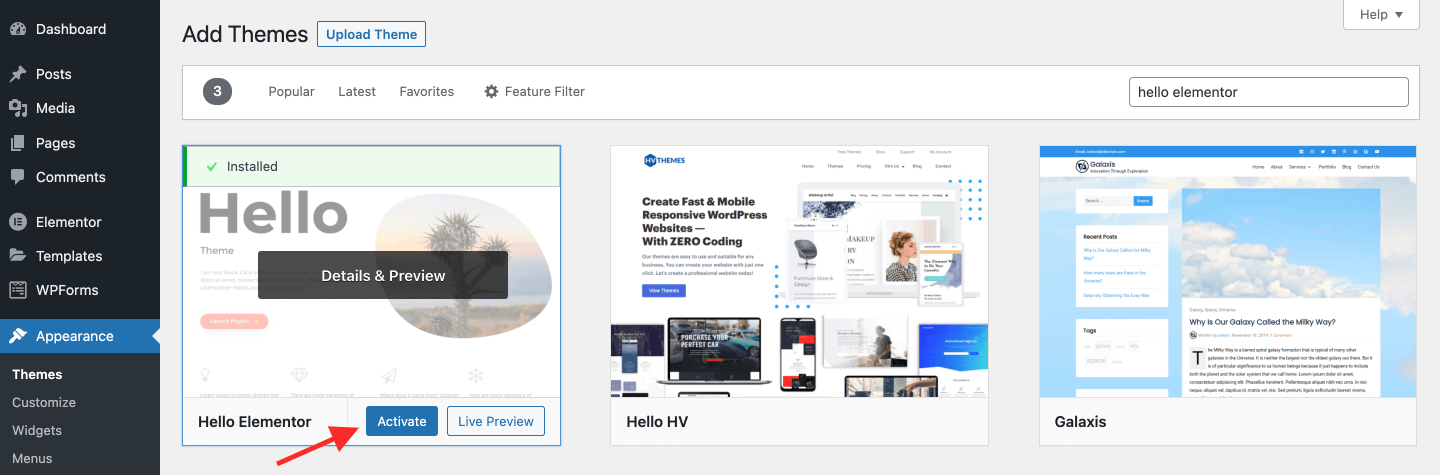
To build your website, you can start by choosing a simple theme for your website.
Navigate to Appearance > Themes > Add new and search for the “Hello” theme.
Then install it and click “Activate” to enable it.
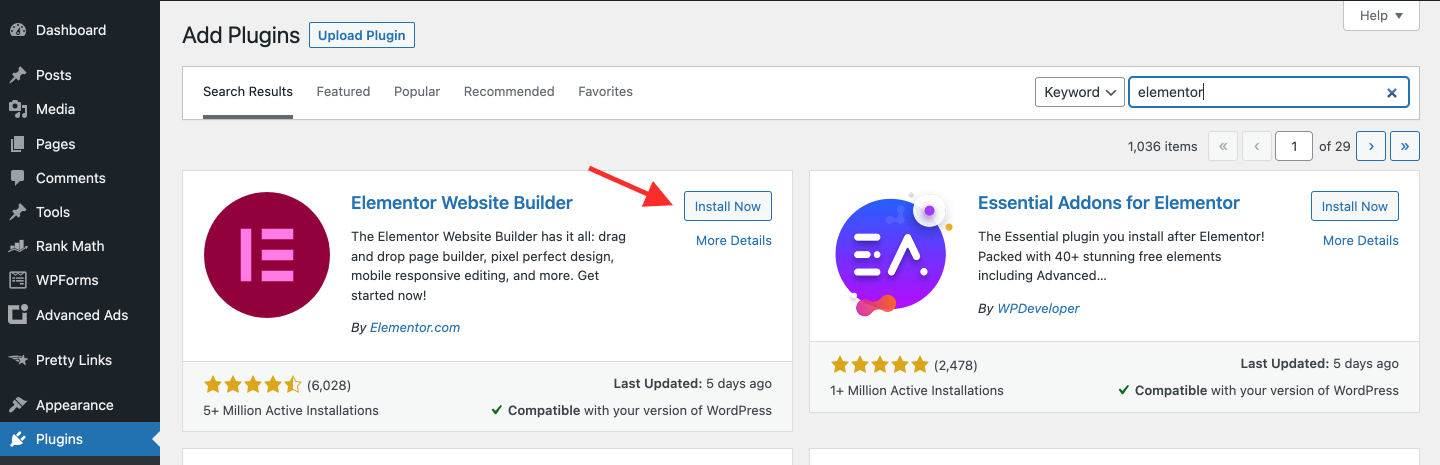
In addition, I recommend installing the Elementor WordPress page builder plugin. It helps you build your website in a drag-and-drop website builder without writing a single line of code.
Navigate to Plugins > Add new and search for “Elementor” to install and activate it.
With Elementor, you can design an appealing website easily without any design experience.
Here’s a free YouTube course created by the Elementor team to help you learn everything from scratch:
You can also head over to Elementor’s YouTube channel for more design tips.
After all of the customizations, make sure to publish it to see every website visitor. You can also create many pages, such as About Us, Contact Us, and Privacy Policy for your website, following the same process.
And don’t forget to make a logo for your new website with the help of online platforms like Looka.
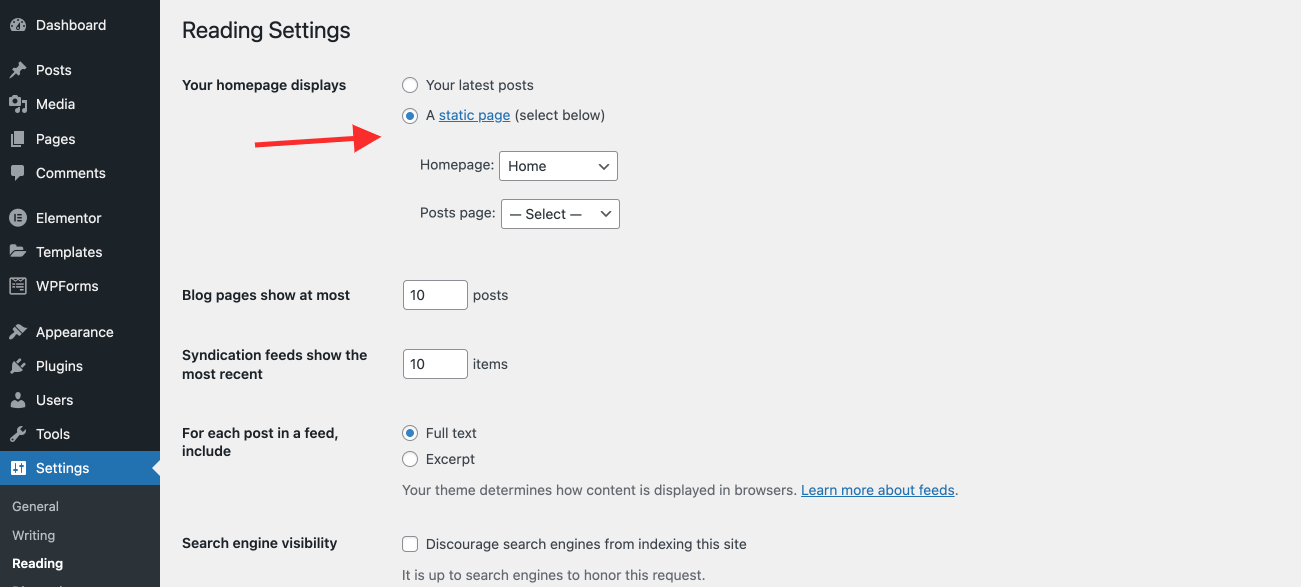
After you’ve customized a page for your homepage, you need to set it as the home page in WordPress settings.
To do that, go to “Settings” from the WordPress dashboard and navigate to the “Reading” section. Then, a page for the home page under the “Your homepage displays” section,n and save it.
Finally, enter your website domain in your browser’s address bar, and see what it looks like!
With Elementor, you’ll figure out that it’s super easy to design anything in a few steps.
Launch Your Website and Keep Improving It
Congrats on your new website!!!
You’ve just learned how to build a website with WordPress on your own!
Moreover, there are many types of websites you can build with WordPress. But they’re not limited to Portfolios, Online stores, Booking sites, Forums, Job boards, etc.
No one can put ads on your website, and no one can limit your features on the website. There are plenty of WordPress plugins that can help add more functionality to your website.
You have the freedom to do what you love.
As you grow, you can scale your website with higher plans at Bluehost.
Here are a few other tools you can use to improve your website:
- Looka: This is an AI-powered free logo designing and branding platform that helps you make a logo for your website with zero design skills. It’s simple.
- Envato: If you want to use digital assets the right way for your website content, promotions, and ads, Envato comes with millions of digital assets, including graphic templates, video templates, fonts, stock photos, music, web templates, and more.
- Constant Contact: This is a powerful email marketing platform where you can create and manage email lists for your website.
- Google Analytics: This is a tool that Google provides to help website owners measure their website performance and traffic. If you want to set up Analytics on your new blog, read this guide.
- Google Search Console: This is the place where you can add your website to Google search engine results. If you want to see your blog on Google, you need to set up Google Search Console for your website first.
Never stop by here; you can do many more things with WordPress. You can explore more guides on our website to learn more about website building and blogging, and hundreds of guides can help you grow online.
Happy website making!