You finally decided to make a website. Then you hit the first big annoying thing: domain names.
What to buy. Where to buy it. And how not to mess it up.
If you are staring at Namecheap right now and wondering if you are doing this the right way, this guide is for you.
Namecheap is popular because it is cheap and simple. But the checkout part still confuses people, especially if it’s your first time.
One wrong click and you end up paying for things you did not need.
So, in the next few minutes, I will show you exactly how to register a domain on Namecheap, the clean way.
By the end, your domain will be live and done.
What's Inside
Why Namecheap?
Namecheap is a great company that offers domain and hosting products at the most competitive prices in the market.
With 11 million domains under management, Namecheap is among the top domain registrars and web hosting providers in the world.
Unlike other domain registrars, they made it super easy to register your domain name with a lot of domain extensions.
More details →
More details →
More details →
Domain extension prices vary by registrar, TLD (.com, .net, .org, etc.), promotions, and renewal rates. Check the registrar’s current pricing at the time of purchase to see live rates.
The .com extension is the most widely used general top-level domain (gTLD) and is recognized globally. It first meant “commercial,” but now anyone can get a .com domain for any reason.
How to Register a Domain Name With Namecheap
When you have a great name for your blog or website, you need to make sure which domain extension best suits you.
This is so important to understand to avoid registering your name with the wrong domain extension.
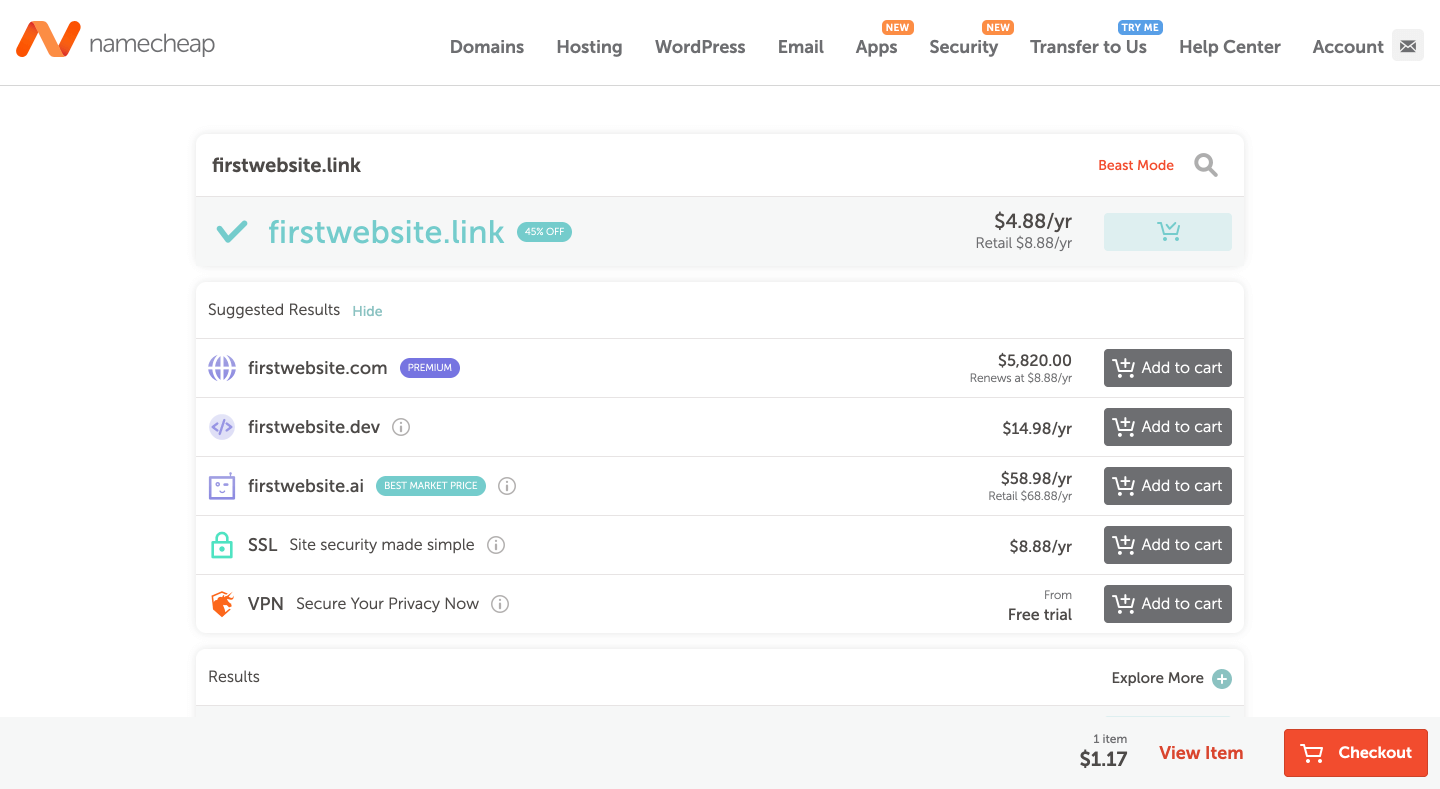
To register your domain name fast, enter any name that you want as your domain below and click on the “Find” button to check the domain availability via Namecheap.
Check if your domain name is available:
powered by Namecheap
Or you can head over to the Namecheap website to check the domain availability.
When you enter any name, Namecheap will show available extensions for that name.
When you find a perfect domain name, click on “Add to cart” and click on the orange “Checkout” button to start the registration process.
If you want to add an SSL certificate for your new domain, you can also add it to your cart along with your domain name.
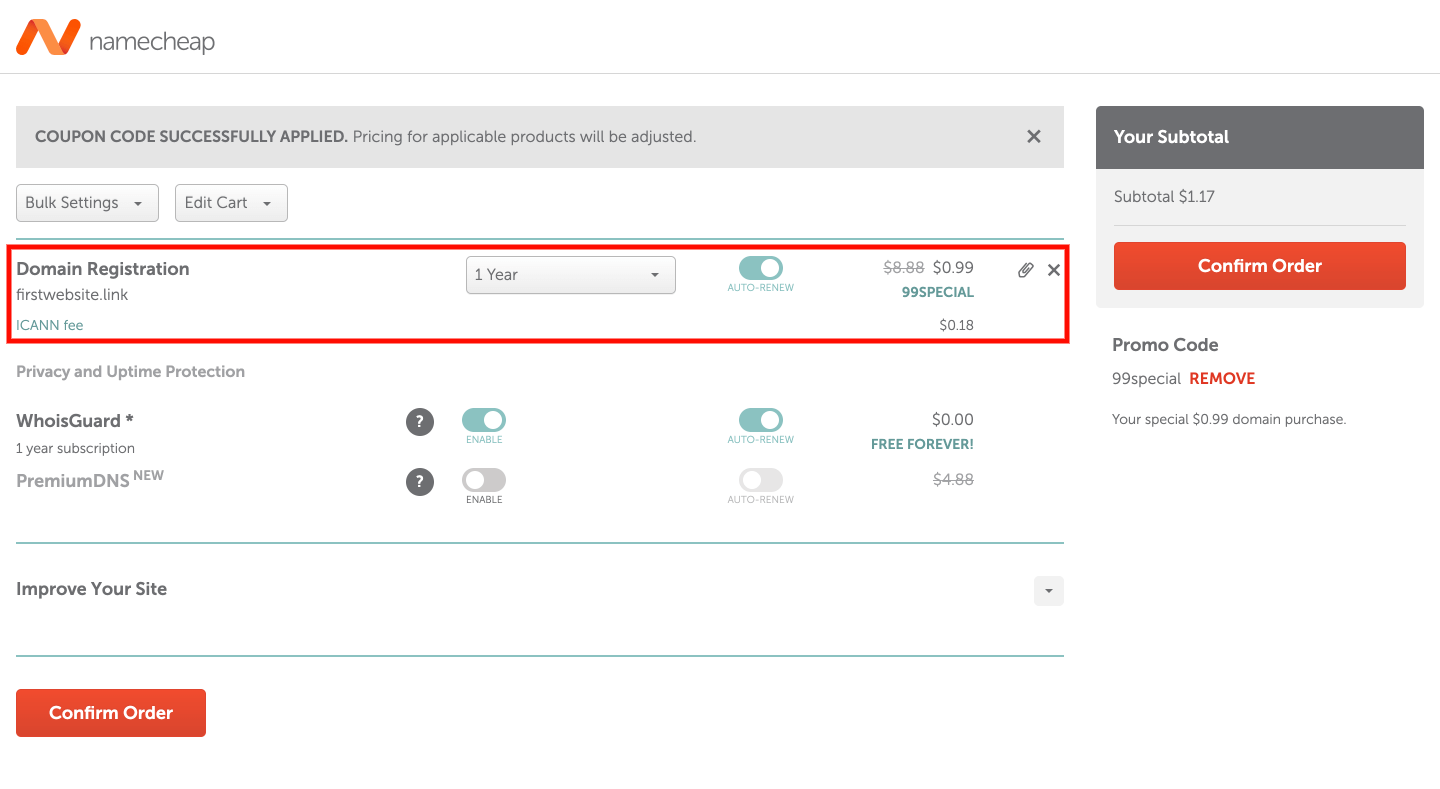
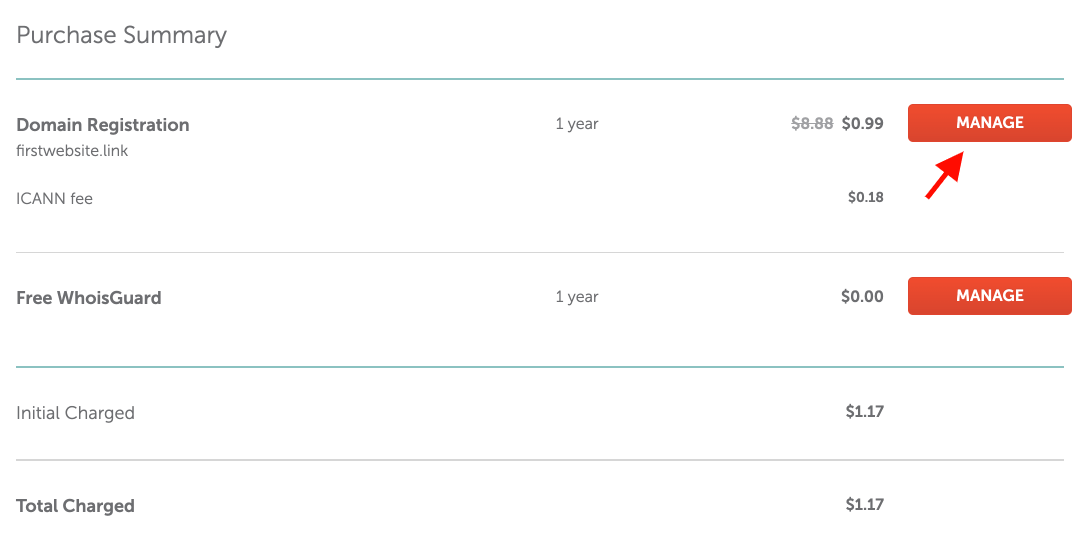
When you head over to checkout, you can make some changes to your registration. As in the screenshot below, you can add additional years to pay at once.
You can also turn on the toggle for the auto-renewal option if you wish to automatically renew your domain each year.
The domain privacy is free forever, so you can switch the toggle on the auto-renewal option.
Namecheap offers promos and coupons every time, so you can check them on their official website. When you have one, apply it and click the “Confirm Order” button to proceed.
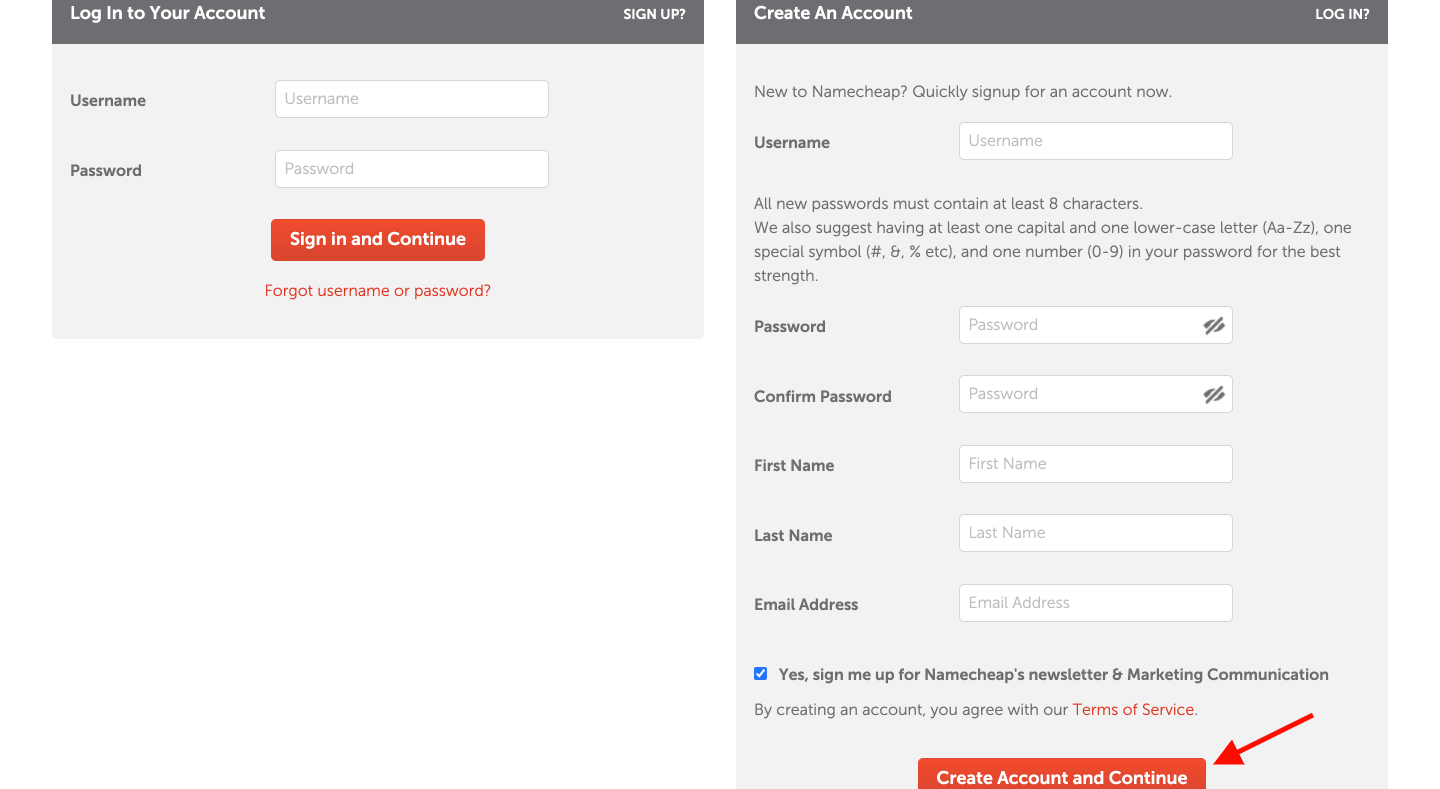
Once you proceed, they will ask you to create an account on Namecheap. You must provide your valid details for your domain registration.
After completing the purchase, you’ll also get an email to check your contact details.
Registrars have to check that your email and contact details are correct, because of ICANN rules. If you don’t confirm your domain contact email within the given time (usually 14-15 days), your domain might be stopped until you finish the check.
The process will take a few minutes, but you can’t skip this.
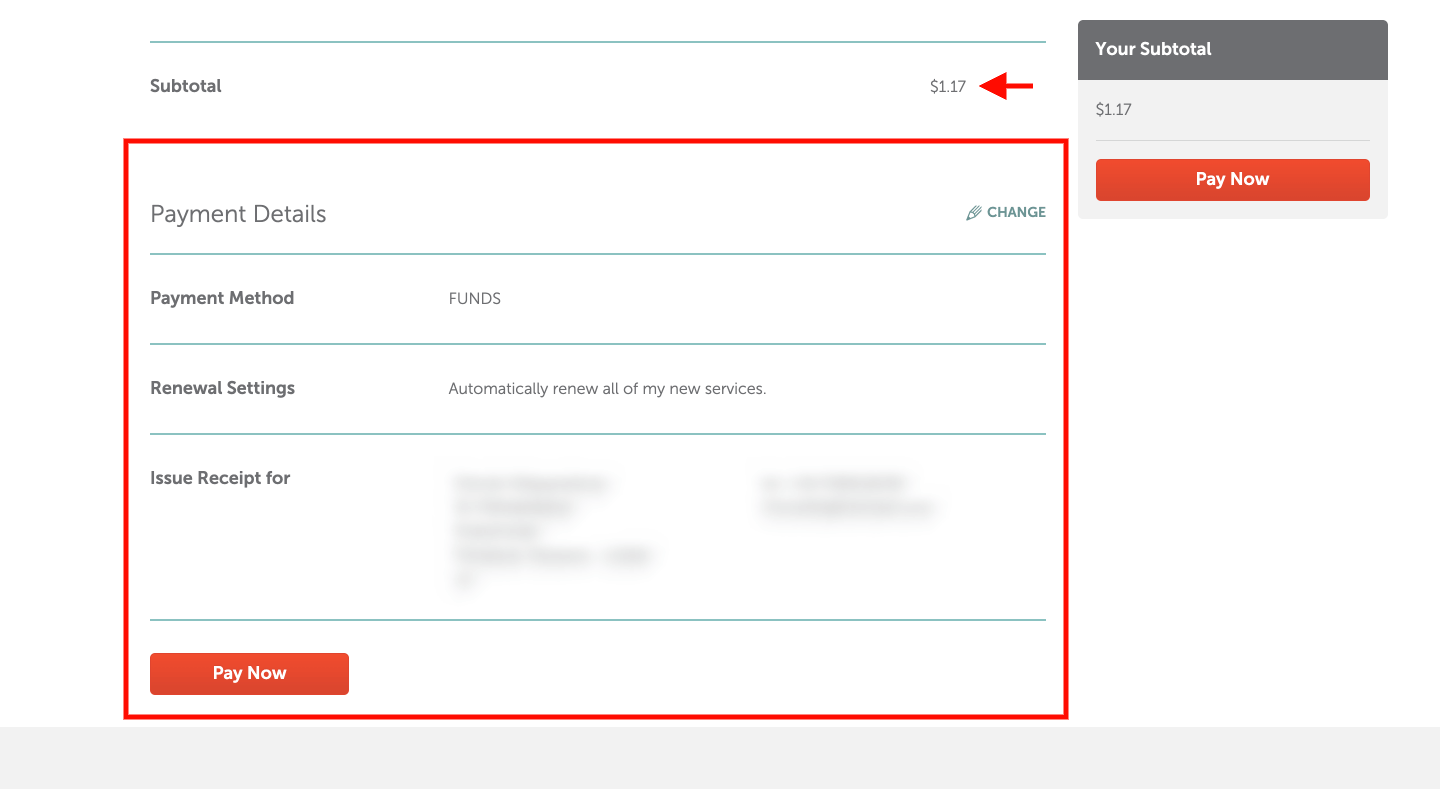
When you’re done, they will take you to the payment processing area to purchase your domain name. All you need to do is choose your preferred payment method and click the “Pay Now” button.
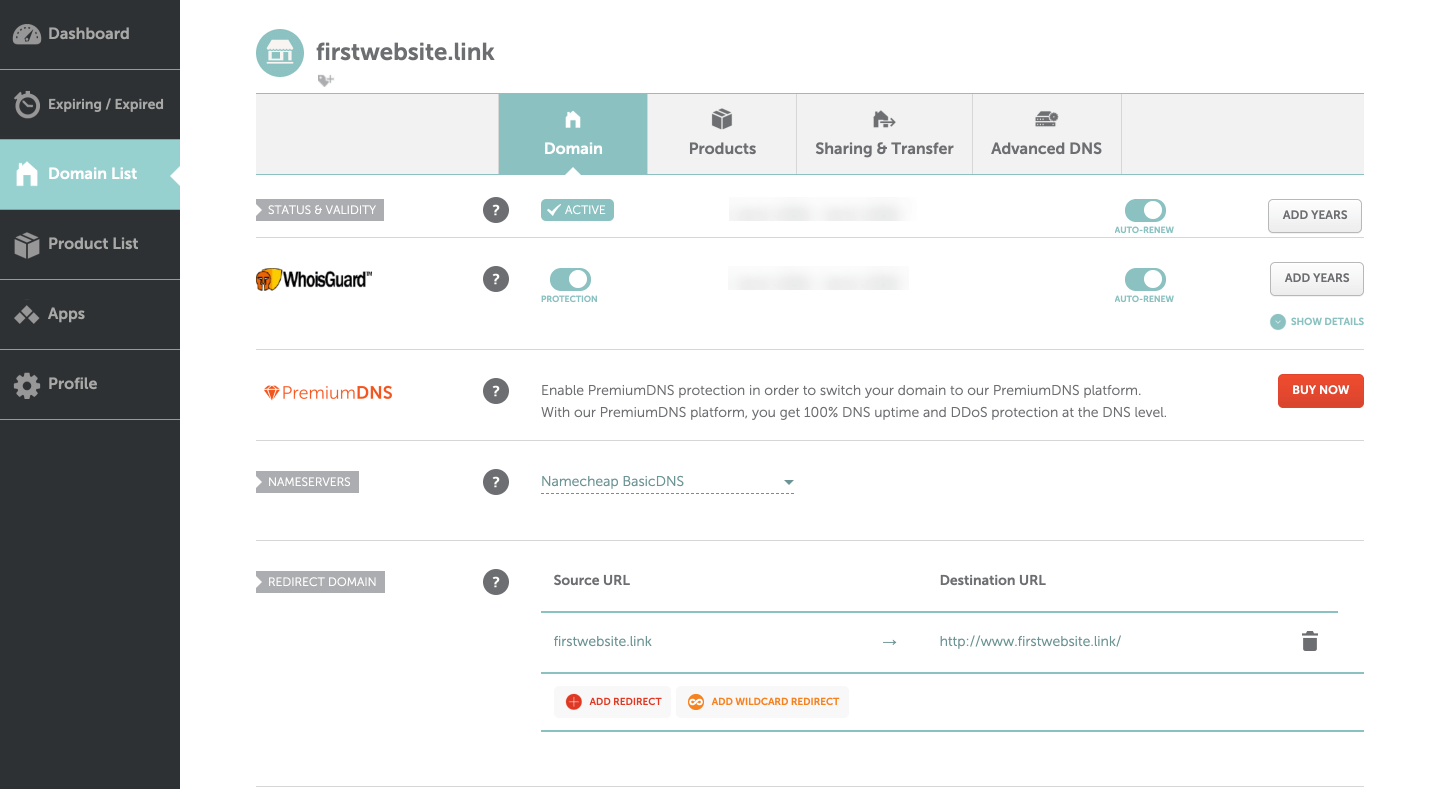
You should now see your purchase summary, and also you can check your email inbox for more details. From the purchase summary page, click “Manage” to manage your Nameservers, redirections, and other options.
With this section, you can change options related to DNS, Nameservers, Email forwarding, etc. Otherwise, redirection options are available to redirect your domain to another social media page or anything.
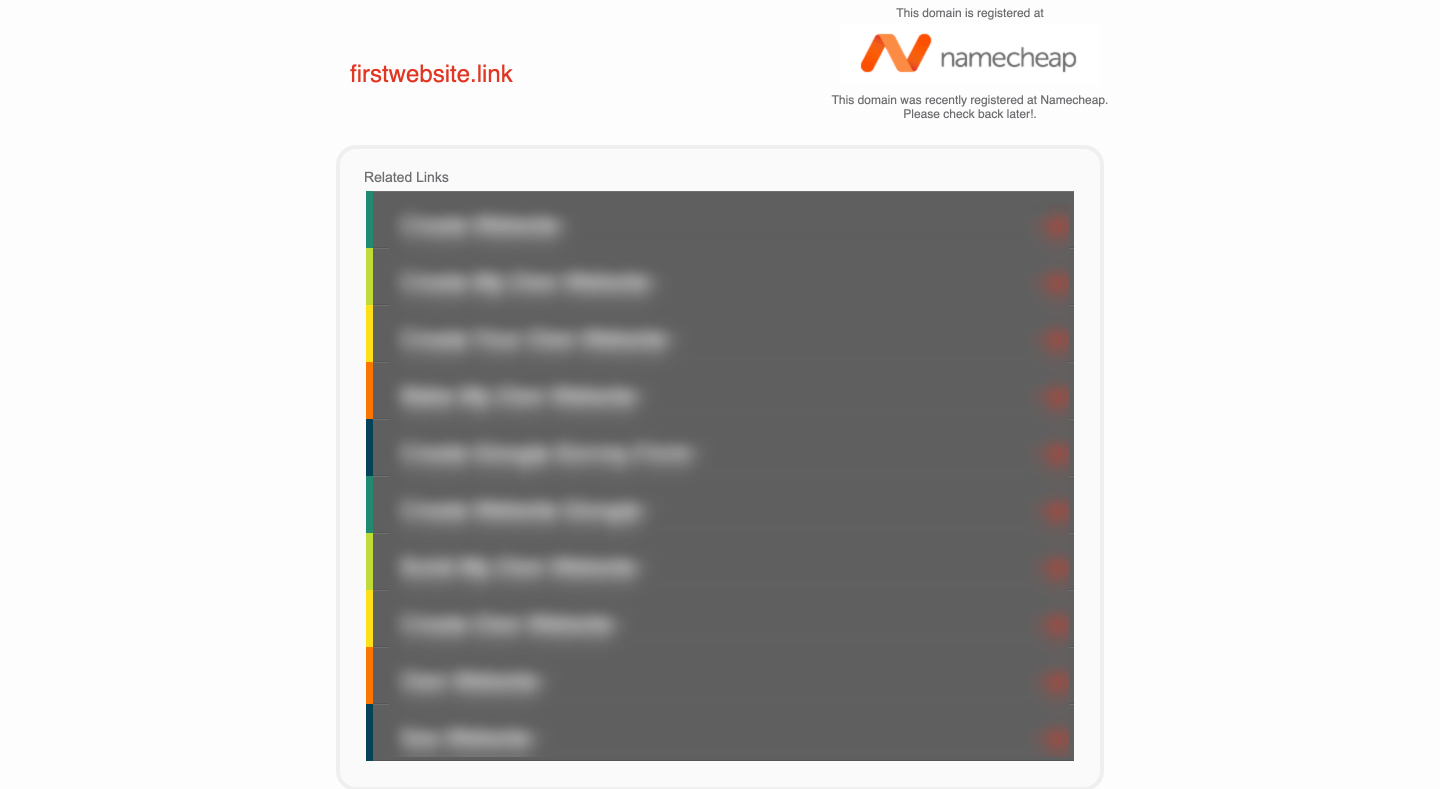
You can check your domain name by entering it in your web browser’s address bar, and it will be showing up you the following page. This is the default Namecheap domain parking page.
That’s all!
Now you can use your domain to create a website by buying hosting from Namecheap, or you can point it to your blog or website builder by following their guides.
How to Redirect Your Domain Name
If you want to redirect your new domain to any other web property, such as a social media page, landing page, or Etsy shop, you can simply do it from the domain management section at Namecheap.
All you need to do is:
- Log in to your Namecheap account and navigate to “Domain List” and click manage next to your domain name.
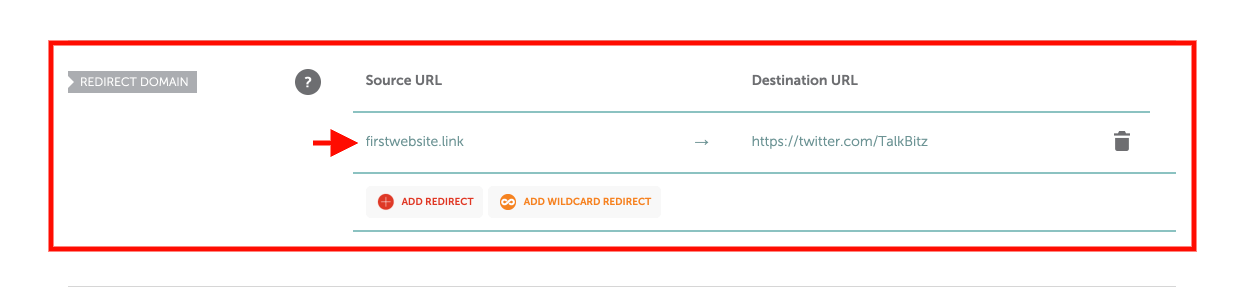
- Scroll down to the “Redirect Domain” section.
- Click on the Destination URL and add your destination.
- Click on the green checkmark icon to save it. (You can delete it anytime.)
That’s all!
How to Set Up Email Forwarding
This Email Forwarding feature allows you to create personalized email addresses for your domain and forward emails to other email addresses you own.
For example, you can create one with admin@yourdomain.com, and you can forward all the emails you’ll get to another email address like yourname@gmail.com.
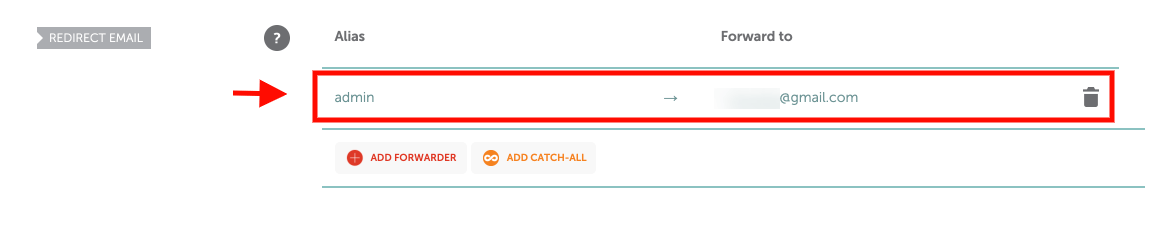
- From your Namecheap account, navigate to “Domain List” and click Manage next to your domain name.
- Scroll down to the “Redirect Email” section.
- Add any name under the Alias. (it can be admin, contact, hello, or something)
- Under the Forward to option, add any email that you want to receive future emails. (Any email address you own.)
- Click on the green checkmark icon to save it. (You can also delete it anytime.)
This may take some time, so make sure to allow about an hour for it to be completely set up.
After it has been successfully activated, you will be able to test your mail service.
Wrapping It Up

Namecheap is a solid spot to get your domain.
You can lock in your name in just a few minutes, no stress. Their support is actually helpful too.
If you still need an SSL certificate, you can grab one from Namecheap. This keeps your site secure and builds trust.
Or if you’re using Namecheap hosting, they’ll offer you a free SSL for your first year.
If you need any help with that, follow this guide.
Now you’re all set. Go build something cool on your new domain.