The first time I needed a custom font in Canva, I spent about ten minutes scrolling through the font dropdown thinking it had to be hiding somewhere in there.
It wasn’t.
Then I found the upload option, clicked it, and got a screen telling me I needed a paid Canva plan. So, that was a fun way to figure things out.
Anyway, if you came here after finding out the hard way, the Free plan doesn’t let you do this. This feature is only available on Canva Pro, Canva Teams, Canva Business, Canva Education, and Canva for Nonprofits.
But if you’re on a paid Canva plan, there are two ways to upload fonts in Canva. Depending on what you’re doing, one will make a lot more sense than the other.
Let’s upload your first font!
What's Inside
What You Need Before You Start
You need to get the font file downloaded to your device first. Canva accepts OTF, TTF, and WOFF files. If the font you downloaded came as a ZIP, extract it.
I’m saying this because Canva won’t take the ZIP file directly, and the error message it shows doesn’t make it clear what went wrong.
On top of that, you must have to check the font license before you upload too. Some fonts are free for personal projects but not for commercial work.
If you’re designing for clients or making templates you plan to sell, you need a license that covers commercial use. Most fonts from Google Fonts are fine for both, but you still have to check that from where you download the fonts.
Each Brand Kit, which is where Canva saves these fonts, can hold up to 500 fonts. That means you probably won’t run into this limit unless you manage a lot of brands or projects.
Where to Find Fonts to Download
Google Fonts is usually the first place I look for fonts. It is free to use, open-source, and comes with more than 1,900 font families.
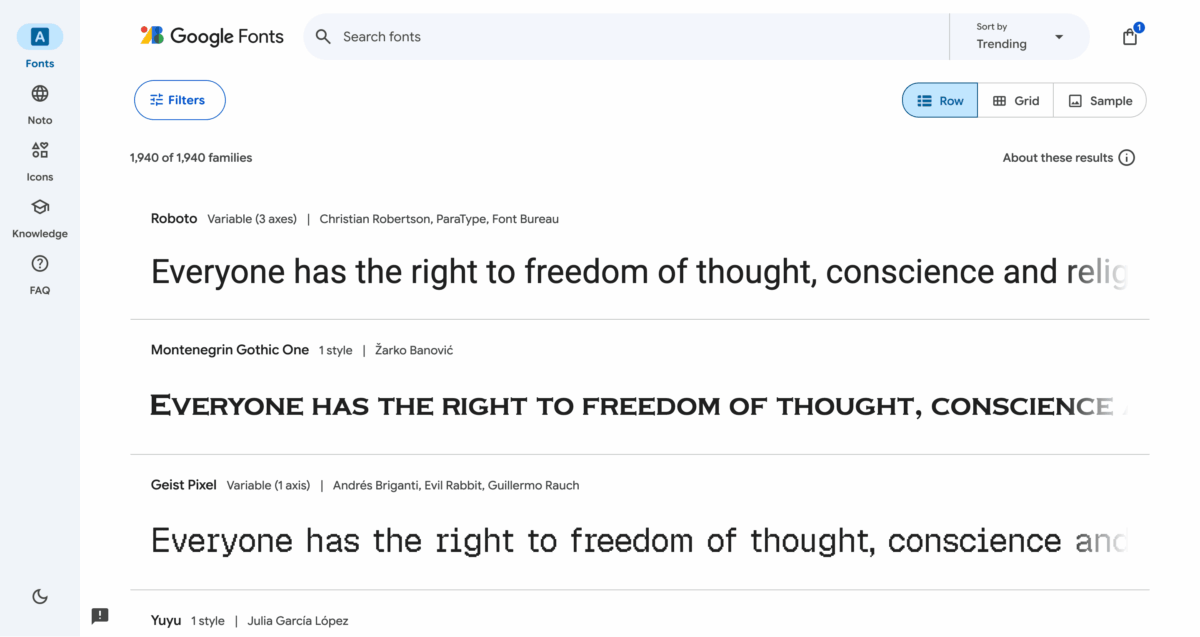
You can easily find fonts by filtering them based on style, thickness, and language. For most projects, I start here.
Creative Market is another place to look when you want fonts that have a different style and don’t look like the usual ones. It’s paid, but the quality is noticeably better than most free font sites.
They have a subscription plan with monthly download credits, which makes it more manageable over time.
DaFont has a massive free library. The range goes from elegant scripts to fonts that look like they belong on a horror movie poster, and everything in between.
Don’t forget to look at each font’s license before using it, because a lot of them are limited to personal use only.
If you’re a designer always looking for new fonts for client work and don’t want to spend hours reading license terms, Envato Elements is probably the better choice.
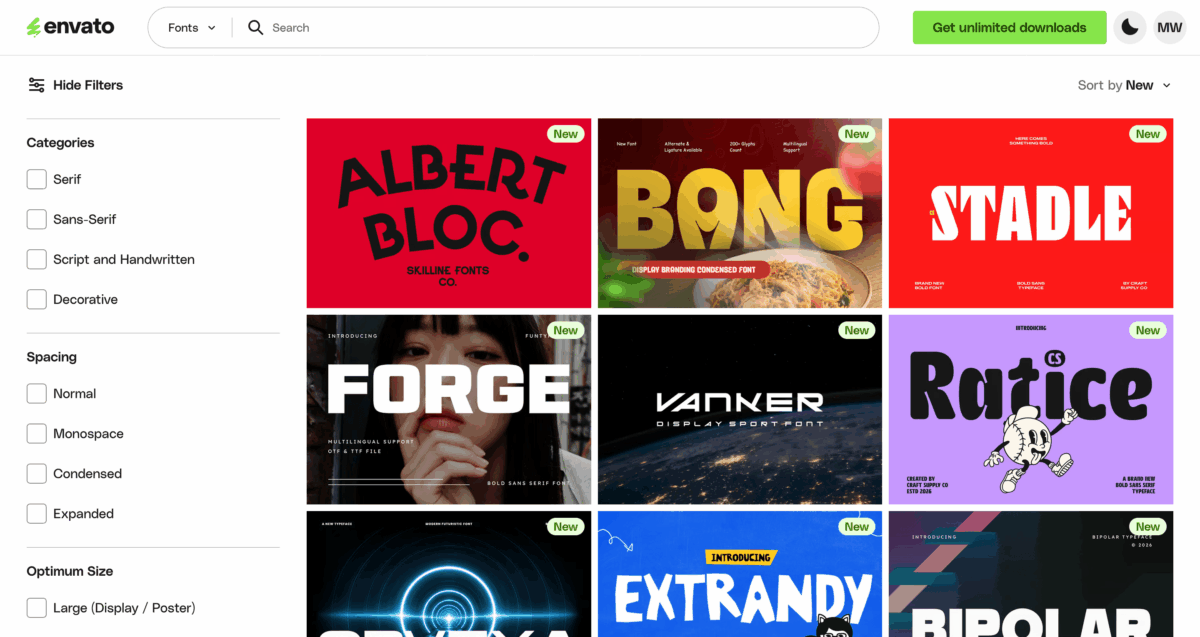
That’s the main reason, and they handle this problem pretty well.
All items, including fonts, are included under one commercial license, so you can use them for personal or client projects without spending time checking every detail.
Even if you cancel your subscription, the projects you already registered will keep their coverage.
The font library itself is really good, and many fonts have different preview images, so you can see the text and understand how the font actually looks before downloading it.
But the bigger thing is that it’s not just a font library. This one subscription also gets you access to over 28 million assets like music, stock photos, videos, icons, design templates, and more.
If you’re creating so many things regularly, you’ll likely use it for a lot more than only finding fonts.
Method 1: Upload Via Brand Kit
This is the better option if you’re building a brand and want all your fonts ready and organized across your designs. It also makes things easier if you have team members who need to use the same fonts.
Go to your Canva homepage > Brand in the left sidebar and then you’ll see options for Brand Kit, Brand Templates, and Brand Controls.
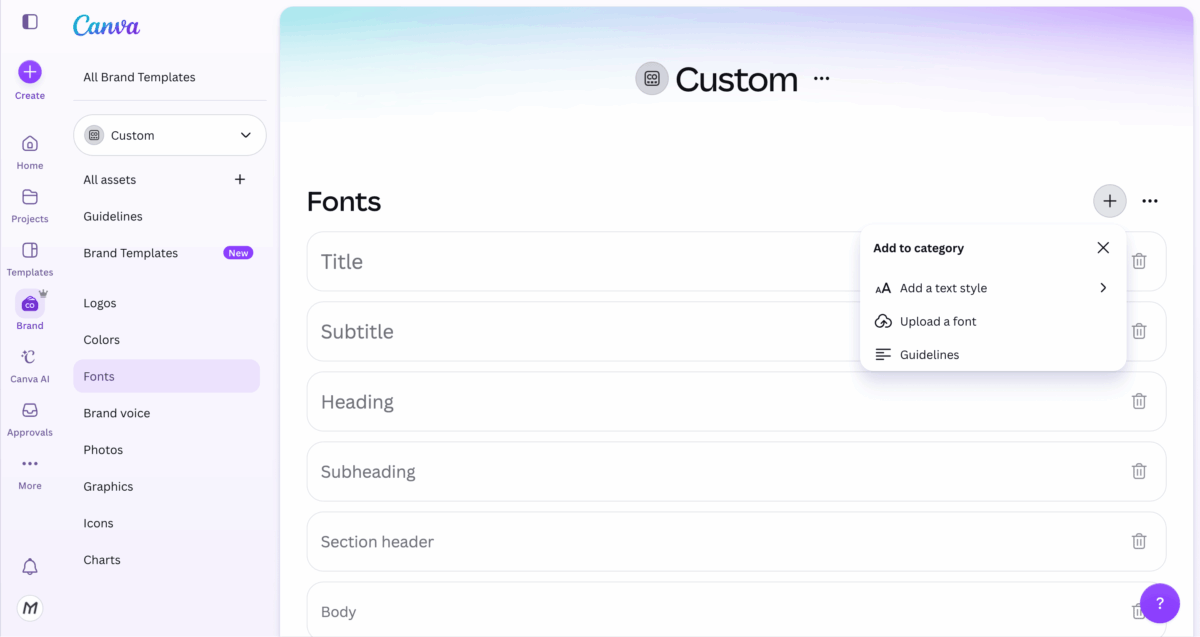
If you have multiple Brand Kits, pick the right one first, or if you don’t have one, create a new one. Scroll down to the Fonts section, then click the + icon > Upload a font > Add new.
Then select your font file from your computer. Canva will ask you to confirm that you have the rights to use it. Confirm, and it uploads.
Once it’s uploaded, you can set it as your heading font, subheading font, or body font directly from the Brand Kit.
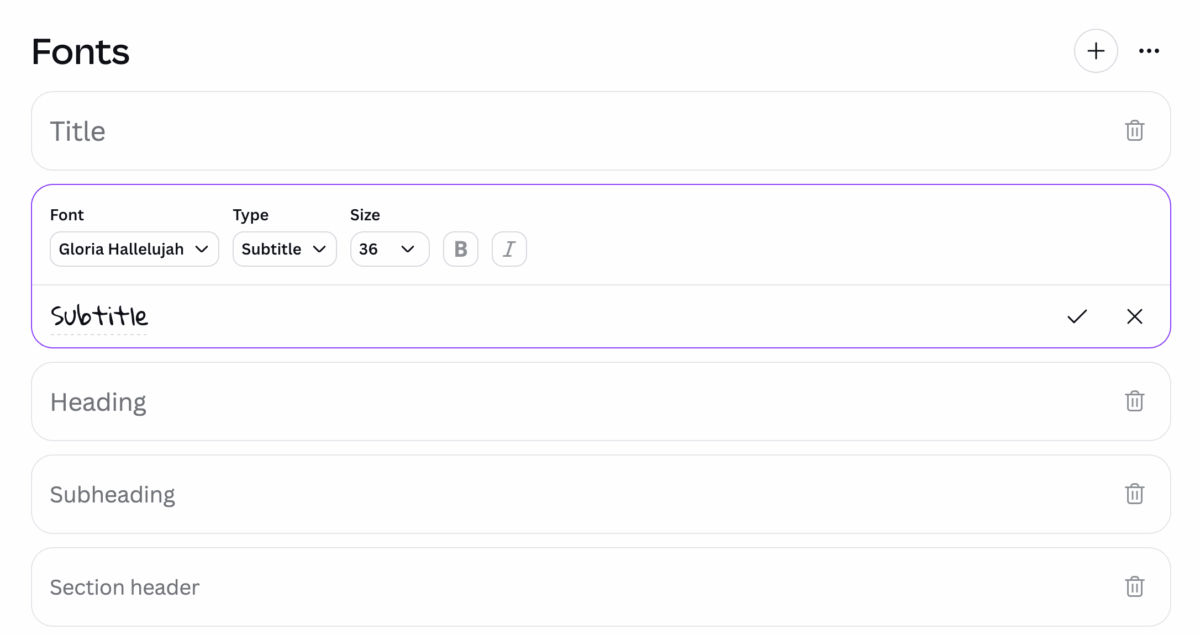
Any new design you create after that will have the font ready to use, so you don’t need to search for it again.
Method 2: Upload Straight from the Editor
This one was easier if you’re already working on a design and realize you need a font you haven’t added yet. There’s no need to leave the editor to go set it up in Brand Kit.
Open the design, click on any text box (or add one if there isn’t one), and click the font name in the toolbar at the top.
The font panel opens on the left. Scroll to the very bottom of that panel, and you’ll see the Upload a font button is right there at the bottom.
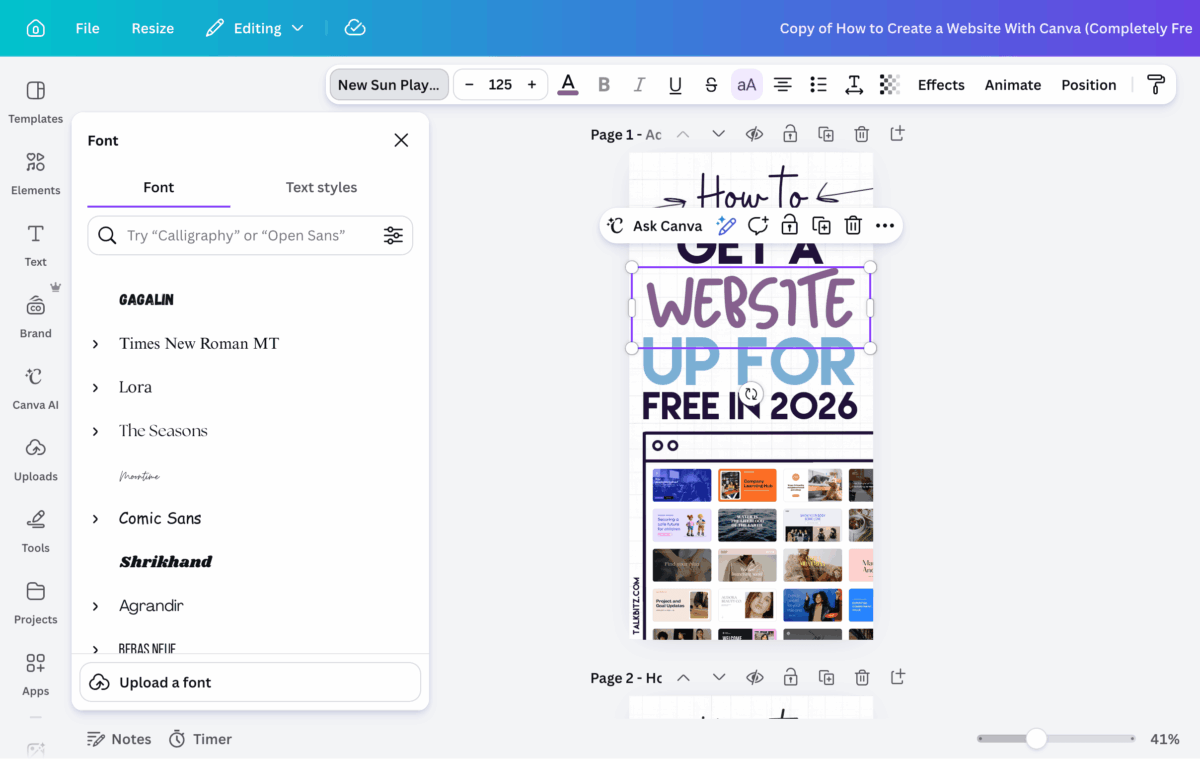
Click it, pick your font file, confirm the license, and it uploads.
It goes into whichever Brand Kit was active for that design. Worth knowing if you manage separate Brand Kits for different projects, because it won’t always drop into the one you’d expect.
Both methods do the same thing in the end. The Brand Kit method is more useful when you’re setting up your full brand system. The Editor method is faster when you’re already working on a design and just need to add one font quickly.
The Bold and Italic Problem Most People Don’t Know About
When you upload a font file, you’re uploading one specific style of it, usually the regular version. If you click the B button in Canva’s toolbar after uploading and nothing changes, or the button looks grayed out, that’s exactly why.
Canva doesn’t create real bold or italic versions from one uploaded font file. You need to upload the separate font files for each style.
So when you download a font family, look for all the weight files that come with it. You’ll usually see something like FontName-Regular.ttf, FontName-Bold.ttf, FontName-Italic.ttf in the downloaded folder.
Upload all of them at once. Canva groups them automatically under the same font name.
This confused me a lot at first. I thought Canva was just glitching, so I kept re-uploading the same regular font file. It took me way longer than it should have to realize I needed the other font files too.
So at least now you won’t waste time trying to figure it out.
One more thing to know is, if you uploaded fonts before July 2023, the font styles might not show up together correctly. I saw some users on Reddit mention problems with older uploads, and uploading the full font family again together can fix it, but it’s better to contact Canva if you have such issues.
Finding and Using Your Uploaded Font
If you can’t find what you’ve uploaded, and the upload was successful, your font should work just like any other font in Canva.
Click a text box in any design, open the font dropdown, and look under Uploaded Fonts. If you assigned it through Brand Kit, it’ll also show under Brand Fonts at the top of the list.
If your font list is getting long and you need a specific font, just search for its name in the font box. It makes finding it much easier.
When the Upload Doesn’t Go Through
A few simple things that can cause problems when you’re trying to upload fonts in Canva.
First of all, the wrong file format. It has to be OTF, TTF, or WOFF. Not a ZIP, not WOFF2. If you’re not sure which file to pick from a downloaded folder, look for the .ttf file first.
On the other hand, some fonts have licensing restrictions that prevent them from being uploaded or embedded in third-party platforms. The font file itself can also include settings that control how it can be used.
So if you’re seeing an error that sounds like a permissions issue, that’s probably what’s happening.
Try finding the same font from a different source, or get the commercial license that covers embedding.
Next, sometimes the issue can be a corrupted file.
This happens more often with fonts downloaded from less reliable websites. Try downloading the font from Google Fonts or a good, reputable one instead and upload it again.
And if you have a team set up inside Canva, team permission issues can be another reason.
If you’re on a shared Canva workspace and the upload option isn’t showing up even though you’re on Pro, check your role. Only team owners, admins, and brand designers can upload fonts.
Regular team members won’t see the option no matter what plan they’re on. Your admin will need to do the upload, or you’ll need to ask them to adjust your permissions.
Final Thoughts
The font you pick matters more than people realize. This is especially true in Canva because a lot of users choose from the same font library.
You can use them, I can use them, and millions of others do the same.
A custom font is one of the best ways to make your designs actually look like a brand and not just another free template.
Google Fonts will work well but if you’re creating designs regularly for a brand or clients, finding unique fonts while also dealing with licenses can become the harder part.
That’s where Envato Elements makes more sense. One commercial license across everything, a font library that’s actually worth browsing, and the subscription covers a lot more than fonts when you need it.
Upload the font, then start creating your design!
Frequently Asked Questions
- Can you upload fonts to Canva for free?
- No. Font uploads are only available on paid Canva plans: Canva Pro, Teams, Business, Education, and Nonprofits. Free plan users don’t have the option at all.
- What font file formats does Canva accept?
- Canva accepts OTF, TTF, and WOFF files. If your font downloaded as a ZIP, extract it first. Canva won’t accept a ZIP directly and the error it gives you isn’t always obvious about why.
- Why are bold and italic grayed out after uploading?
- You only uploaded the regular font file. Bold and italic are separate files that need to be uploaded individually. Download the full font family and upload all the weight files together. Canva groups them automatically under the same font name.
- Are DaFont fonts safe for commercial designs?
- Many fonts on DaFont are listed as personal use only, which means you can’t use them for client work or commercial projects unless the creator allows it. Always check the license on each font page before uploading it to Canva.