
Filmora video editor!
Making videos is the most powerful and effective way to engage with more audiences around you. That’s why people use YouTube every day.
If you are a YouTube content creator or someone else making videos, You have to make attractive videos to get more views.
Filmora has simplified its features to create your videos, regardless of your skill level.
Moreover, Filmora has given you simple features to edit your videos by adding special effects, transitions, audio, filters, elements, green screens, and more.
Let’s see how to use it!
Disclosure: Our website is reader-supported. If you purchase any product through our partner links, we may earn a commission at no extra cost to you.
How to Download & Install Filmora Video Editor
Filmora is available on Windows and Mac OS as well. Filmora at least needs 4GB ram to work on it, If you are having trouble with other tech specs, please refer to their system requirements page to find out more information.
If you have already installed Filmora, Go to Menu > Help > Update to install the latest Filmora version.
After you complete the installation, you can use
Unfortunately, they show a Filmora watermark when you render the final video with the free license. If you don’t want to see a watermark on your videos, you need to buy their license from their website.

FlexClip is a simple and easy-to-use online video making website that allows you to create videos in minutes. → Learn More
How to Create a New Project
- Open the Filmora > choose New Project from the splash screen. Or just navigate to the Menu > File > New Project to create a new one. (Ctrl+N)
- Go to Menu > File > Project Settings to select your preferred resolution and frame rate.
- After you are done with creating the first project, You can see the work-space area of the Filmora.
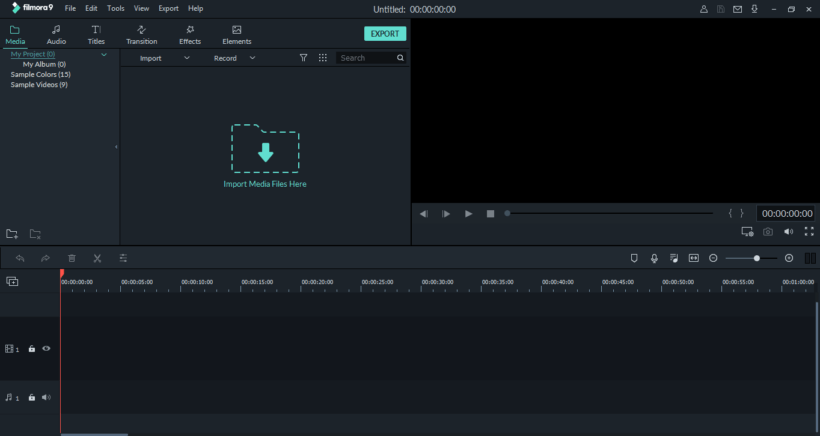
How to Import Media Files to Filmora Video Editor
Filmora enables you to import standard, HD, and even 4K videos. If you decide to work with 4K videos you just need a high-performance PC with up to 8GB RAM.
Go to Menu > Files > Import Media to import files you love. Here you can see some more import options other than default import.
- Media Files (import media files directly.)
- Media Folders (import media folders from your pc.)
- From a Camera or a Phone (import media files from that your devices connect to the pc.)
- Instant Cutter Tool (import media files with trimming or merging from your pc.)
How to Record Media
Filmora video editor comes with handy features so that you don’t need to worry about your video editing skills. You never need other software to do these things, recording features are in-built with Filmora 9.
Go to Menu > Files > Record Media to record media content live.
- Record From a WebCam (It enables you to record videos from your computer’s webcam)
- Record PC Screen (Record your PC screen)
- Voice Over (Record your own voice)
How to Make a Video Using Basic Editing Features
Before you get started, you have to select media files to edit you already imported to the Filmora. Here are two ways to do this,
- Drag and drop files from the media library to the timeline.
- Right link on any file from the media library and choose the option Insert.
Let’s Move on with Basic Features!
- Trim: Hover your mouse pointer left or right edge of the clip until the trim tool icon shows. Then, click and drag the edge of your clip forward or backward to trim easily.
- Splitting: Place the play head (red row) at the position on the timeline where you want to split, right-click, and choose Split.
- Joining Videos: Just drag and drop any clip to the timeline. It is automatically combined when exporting (render).
- Enhancing: Double-click on any clip in the timeline to enter the Edit panel and select the Color menu. This way, you can adjust white balance, tone, color, light, and HSL by adding vignettes.
- Playback Speed: Right-click on any clip in the timeline and select Speed and Duration.
- Add Text: You can add texts and titles to your video easily using customizable premade effects. Move to the titles tab and choose your own and add your preferred text.
- Add Background Music: You can import audio files to the media library and drag and drop them to the timeline easily.
How to Export Final Video to Computer
Filmora just supports WMV, MP4, AVI, MOV, F4V, MKV, TS, 3GP, MPEG-2, WEBM, GIF, and MP3.
Exporting is easy,
- Click on the Export button on the tab bar.
- Select a file format and resolution to export.
- Give a file name.
- Click Export.
Exporting duration depends on the total duration of the video and the resolution you preferred.
Must read: 3 Ways to Download Free Music for YouTube Videos
I hope this quick guide helps you to get a brief idea about how Filmora going to be useful for you.
If this really helps you, don’t forget to share this with your friends!

A blogging friend of mine uses Filmora and she’s got some awesome intros. I am glad to learn that using it is free and easy. I just upgraded from Adobe Premiere Elements to Final Cut Pro X, but I am still learning how to use those more sophisticated features. Thanks for sharing something that sounds simple enough to use.
You are welcome Vox! Yes its simple to use. Give a try!
Thanks for sharing another option – timely for me as I’m presently looking into editing video.
You are welcome Abbey!