
Did you know that website building today has become incredibly easy and efficient even for people who don’t have coding knowledge?
The secret here is no-code website builders. These platforms can help you build a website easily and, even more importantly, affordably!
Pixpa is a no-code website builder platform which makes creating your website a breeze.
Using a simple visual editor and page builder tool, you can create your very own custom website, without hiring a professional or touching a single line of code yourself.
With Pixpa website building becomes affordable and accessible.
In this Pixpa review, let us dive in and take a look at Pixpa and how it can help you in creating a beautiful, professional website all thanks to its ease of use and affordable plans!
Disclosure: Our website is reader-supported. If you purchase any product through our partner links, we may earn a commission at no extra cost to you.
What is Pixpa?
Pixpa is an easy to use, all-in-one website builder platform which empowers creative professionals and small business owners by helping them create beautiful, feature-rich, and professional websites without touching a single line of code.
The platform comes with a rich array of modern, minimalist, and responsive templates that can be fully customized using a simple visual editor and drag-and-drop page builder.
→ Click here to sign up for a full-featured 15-day free trial to test drive the services

Pixpa’s affordable pricing plans, starting from a mere $3/month, are a major selling point. The prices are all-inclusive with no hidden charges. In addition to this, all subscription plans come with SSL security and 24×7 customer service support.
You don’t need to enter any credit card info to sign up so you can enjoy the free trial without worrying about any unexpected charges to your bank account.
Who is Pixpa Designed For?
Pixpa is a full-featured website builder platform with e-commerce functionalities, blogging tools, SEO and marketing tools, a comprehensive client-proofing platform and much more.
As a no-code platform, Pixpa is designed to be used by everyone irrespective of technical expertise and coding knowledge.
Pixpa is ideal for photographers, artists, designers, fashion industry professionals, and freelance creative professionals.
The extensive online store builder is well suited for small business owners looking to create a business website or an e-commerce website.
Additionally, the platform offers a 50% discount for students and educators making it the perfect, affordable website builder for student websites and educator portfolios.
How to Use Pixpa to Build Your Website?
With Pixpa, users can not only expand their business and revenue streams but also establish a brand identity to market and promote themselves and their work.
To start using Pixpa, all you have to do is sign up for the full-featured, 15-day free trial. After that you need to follow these steps:
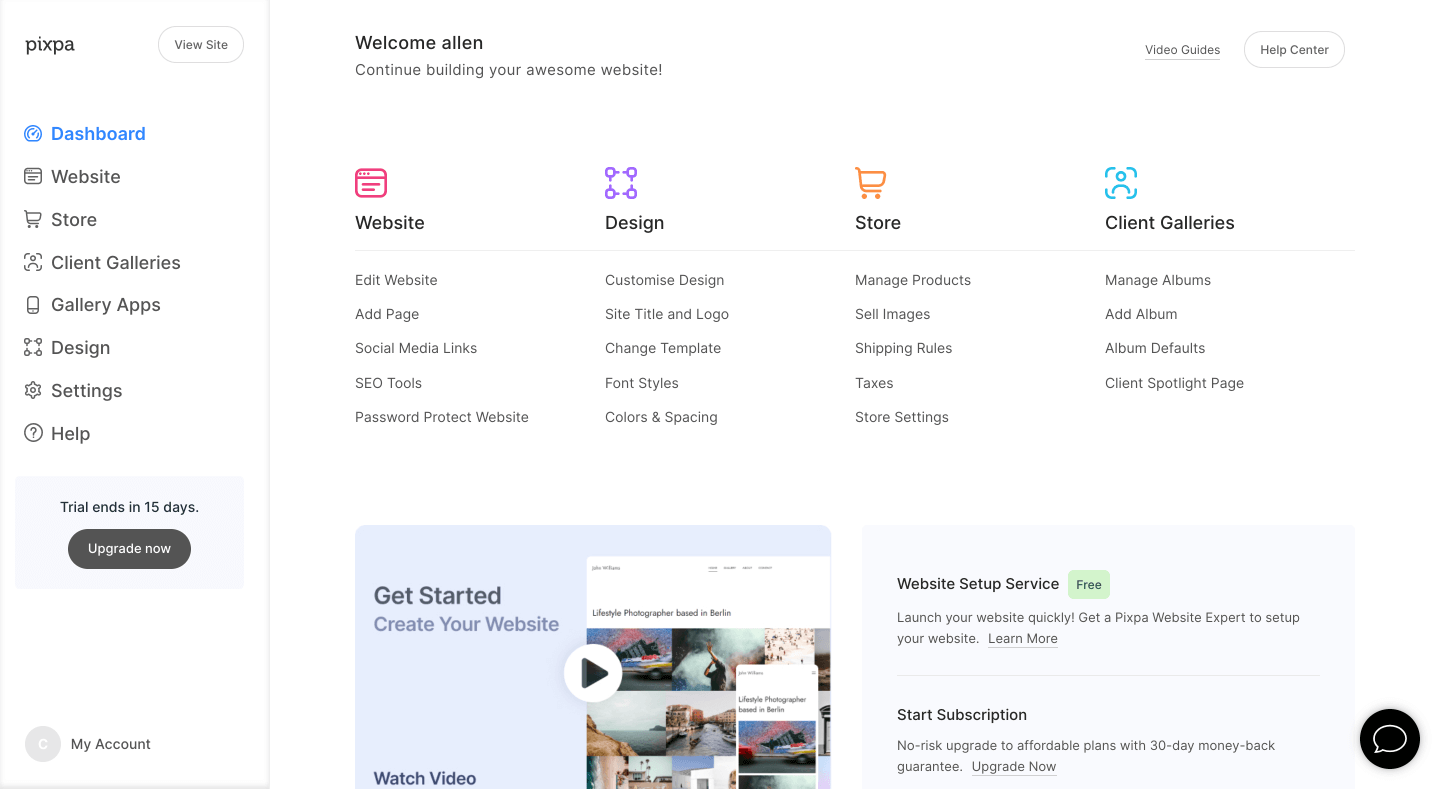
- Once you have signed up for the trial, you will be redirected to the Pixpa dashboard which is your one-stop shop for creating, customizing, and managing your Pixpa website.
- You will see a host of different categories on the left side of your dashboard through which you can design and customize the different elements of your website.
- The ‘Website’ section lets you add galleries, pages, menus, and menu items and set up the basic structure for your website.
- The ‘Design’ section lets you select a template and customize all the visual aspects of your website.
- Specific functions like e-commerce, client galleries, etc can be enabled and managed through their own dedicated sections on the dashboard.
- The ‘Settings’ section is where you can manage custom domain names, payments, 301 redirects and other website settings.
- To start your subscription and get the full Pixpa experience, all you need to do is click on the subscribe button on the bottom bar of the Pixpa studio.
You will also get an email to activate your subscription at the end of your 15-day trial period. If you choose not to subscribe at the end of your trial period, your account becomes inactive and is scheduled for deletion after a month of inactivity.
You can reactivate your account at any point within a month of your trial period ending by contacting Pixpa’s customer service.
Pixpa Templates
Templates are an important feature for any no-code platform. Templates ensure that you are not designing your website from the ground up but instead have something to build off of.
Without templates, website building can easily get overwhelming and confusing.
Pixpa comes with a rich array of pixel perfect, mobile-optimized, and responsive templates that are suitable for a host of different website types. From portfolio websites to fashion websites and online stores, Pixpa has something for everyone.
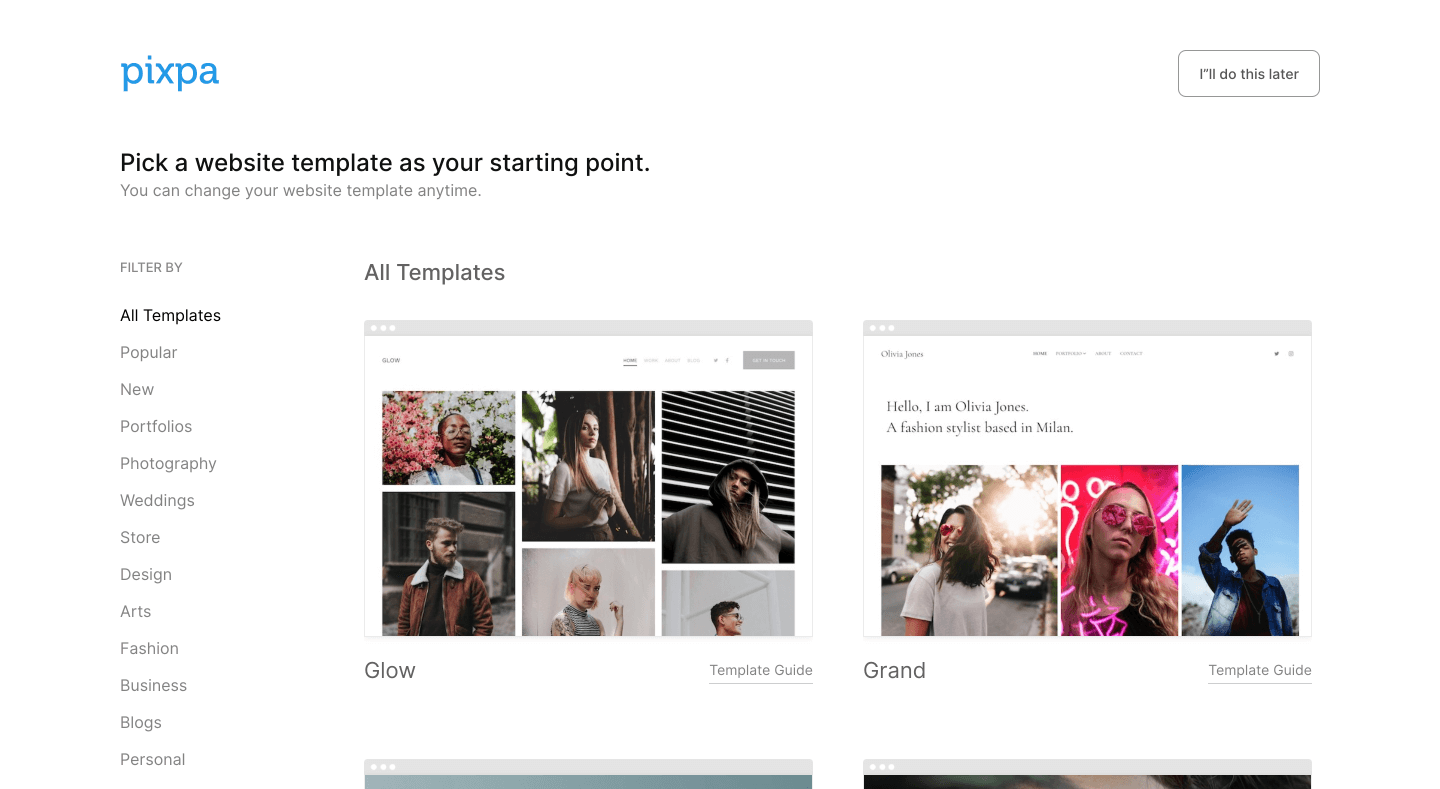
All templates are fully customizable without the use of code. You can change the fonts, color schemes, layouts, and all the other visual elements of your website through the visual editor.
However, if you want to go beyond and personalize your website even further, you have the option of using custom CSS and HTML code.
Client-Proofing Platform
Pixpa’s client proofing platform simplifies what can otherwise be a very complicated and time-consuming process.
Client galleries and mobile gallery apps give photographers the opportunity to provide professional, personalized, and exclusive client proofing services for their clients and meet their needs.
Client galleries are exclusive tools that allow you to create individual, personalized galleries for each of your clients. The galleries can be public or password protected to maintain privacy.
Clients can use these galleries to view their photographs, make shortlists and even order prints directly from your website.
With mobile gallery apps, you can create and share private, downloadable mobile galleries with your clients for a sneak peek preview of featured highlights from a photoshoot.
Mobile gallery apps also come equipped with social media sharing tools and custom icons so that they can be used as effective branding and marketing tools for your business.
E-Commerce Builder
Pixpa also comes with robust e-commerce website builder tools to help build your online store or e-commerce gallery.
These include product and inventory management tools, easy order processing, shipping and tax rates management, discount management, abandoned cart recovery and more.

Pixpa charges no commissions on products sold through their websites, however, payment gateways that are used for transactions may levy their own transaction fees.
Payments can be accepted through Paypal and Stripe.
Pixpa’s e-commerce offerings are not limited to online stores alone. You can also sell photographic or artistic prints through e-commerce galleries and client galleries.
You can even choose to get the print orders auto-fulfilled through WHCC or through a custom lab of your choice.
Pixpa stores can be used to sell both physical products and services as well as digital downloads.
Online stores can be integrated into an existing Pixpa website or you can create an e-commerce website from scratch using the tools provided by Pixpa’s platform.
Blogging Tools
If you want to create a blog for your website, then Pixpa has you covered.
The platform comes with a comprehensive set of tools for blogging including an efficient and intuitive WYSIWYG editor, embeddable media support for images and videos, commenting and moderation features, social media integration, SEO management tools and more.
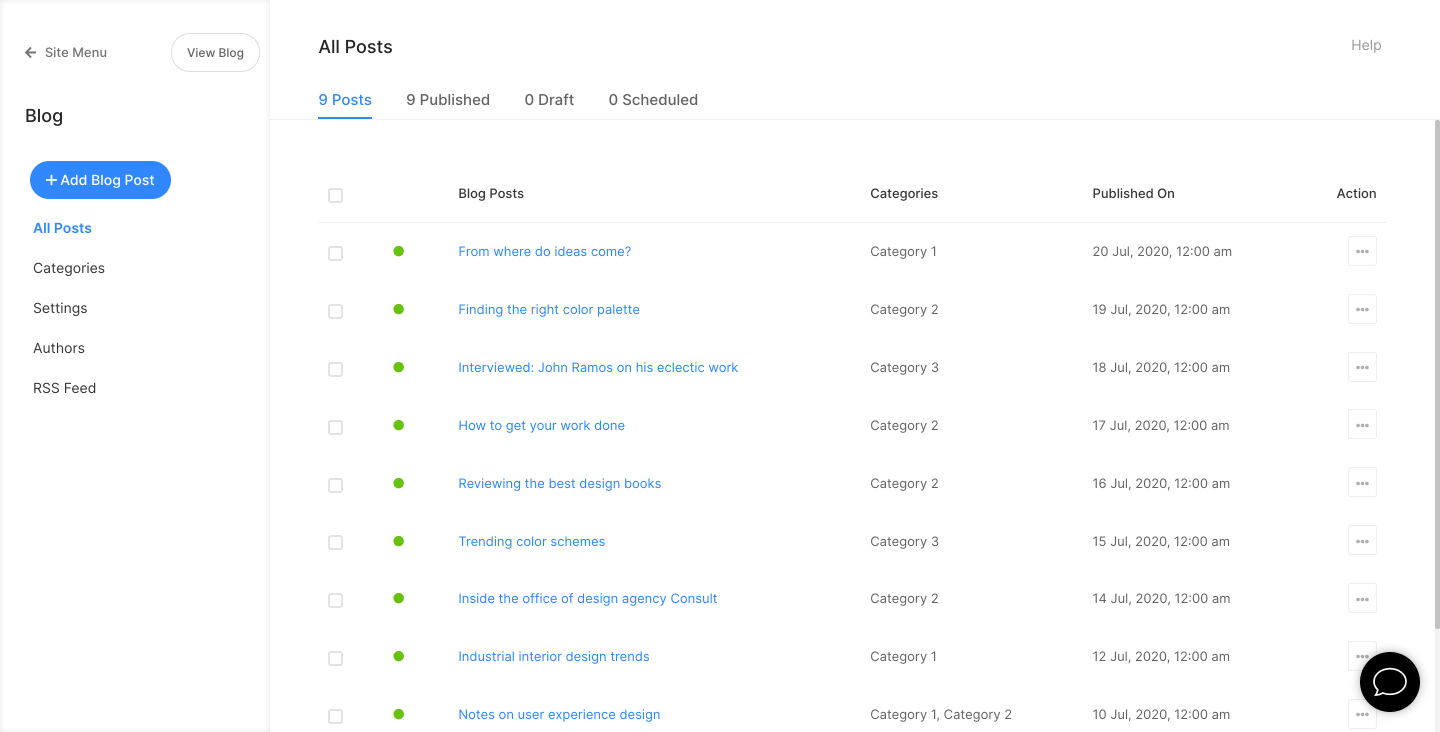
You can use the blogging tools for editing, publishing and scheduling blog posts all from one single platform. Pixpa blogs support multiple authors so you can invite guest posts or create a multi-author blog website.
You can also organize your blog by creating categories, adding a custom sidebar and search features for easy navigation.
All the visual elements of your blog website including fonts, colors, spacing etc can be fully customized for a personalized touch.
SEO & Marketing
SEO and marketing are important aspects of website development. After all it is not enough to simply have a website, you have to promote and market it as well.
Good SEO practices ensure that your website gets good organic traffic through search engines. This along with good marketing helps you get your website’s name and brand out there through which you can grow your business.
Pixpa’s SEO manager comes with an extensive set of tools for managing your website’s SEO. Through the SEO manager, you can set sitewide metadata, including alt tags, specify search engine friendly URLs, generate automatic sitemaps, and much more.
Pixpa websites are based on clean HTML markup which makes it easier for search engines to index your website and improve your SEO rating.
Integrating your website with Google Analytics and Google Webmaster tools can help you understand, analyze and optimize your website’s performance.
The integrated marketing tools include announcement bars, mailing lists for newsletters, social media widgets and more.
Pixpa Pricing
Pixpa comes with four different pricing tiers:
Light – $3 per month (billed annually)
The Light plan is the most basic and most suitable for simple, lightweight websites like resume websites and simple portfolio websites.
Personal – $7 per month (billed annually)
The Personal plan is good for portfolio websites and small business websites and comes with basic e-commerce and client proofing tools.
Expert – $10 per month (billed annually)
The Expert plan is suitable for all kinds of websites with extensive e-commerce and marketing features, a full client-proofing set-up and more.
Business – $16 per month (billed annually)
The Business plan is suitable for larger online stores and features advanced e-commerce and marketing tools
The Expert and Business tier plans also come with a website set-up service which is a free one-time service where you can get a Pixpa expert to set your website up for you. This ensures that you can hit the ground running straight away!
Conclusion
If you are looking for an affordable, feature-rich and easy-to-use platform for building your website, then Pixpa might be the right option for you. The website builder is versatile and capable of handling a wide variety of websites.
Additionally, the quick to respond customer support team makes building with Pixpa an absolute breeze.
There are some downsides, mainly the fact that there is no freemium model or free plans available. At the same time, Pixpa also offers an ad-free experience and the pricing plans are very affordable.
Another relatively minor downside is that if you want to buy a custom domain name for your website, Pixpa offers no built-in options for that.
You need to go to a third-party for purchasing your own domain name.
All in all, Pixpa is an easy and affordable website building solution and suitable for a wide variety of users.
So if you are in the market for a website but are unsure of where to look or start, Pixpa might be the answer you have been waiting for.